

Photos for the report
Included with every subscription
Before you start
- Your role needs Update valuations. If you do not have it, Set up users shows how an administrator gives it to you.
- Open the job's Attachments tab in flat view. Upload the inspection photos first, as in Upload files to a job.
Caption a photo and put it in the report
- Find the photo's card. The Caption field sits under the picture.
- Type the caption the report should show, such as Front elevation.
- Tick Report on each photo the report should include. Untick it on photos that are only for your records, such as a photo of the meter box. The Report tick does not appear on a job whose report uses a long form template.
- Drag the cards into the order the report should show them. Drag by the picture itself.
- Click Save. Captions and the report tick are saved with the job.
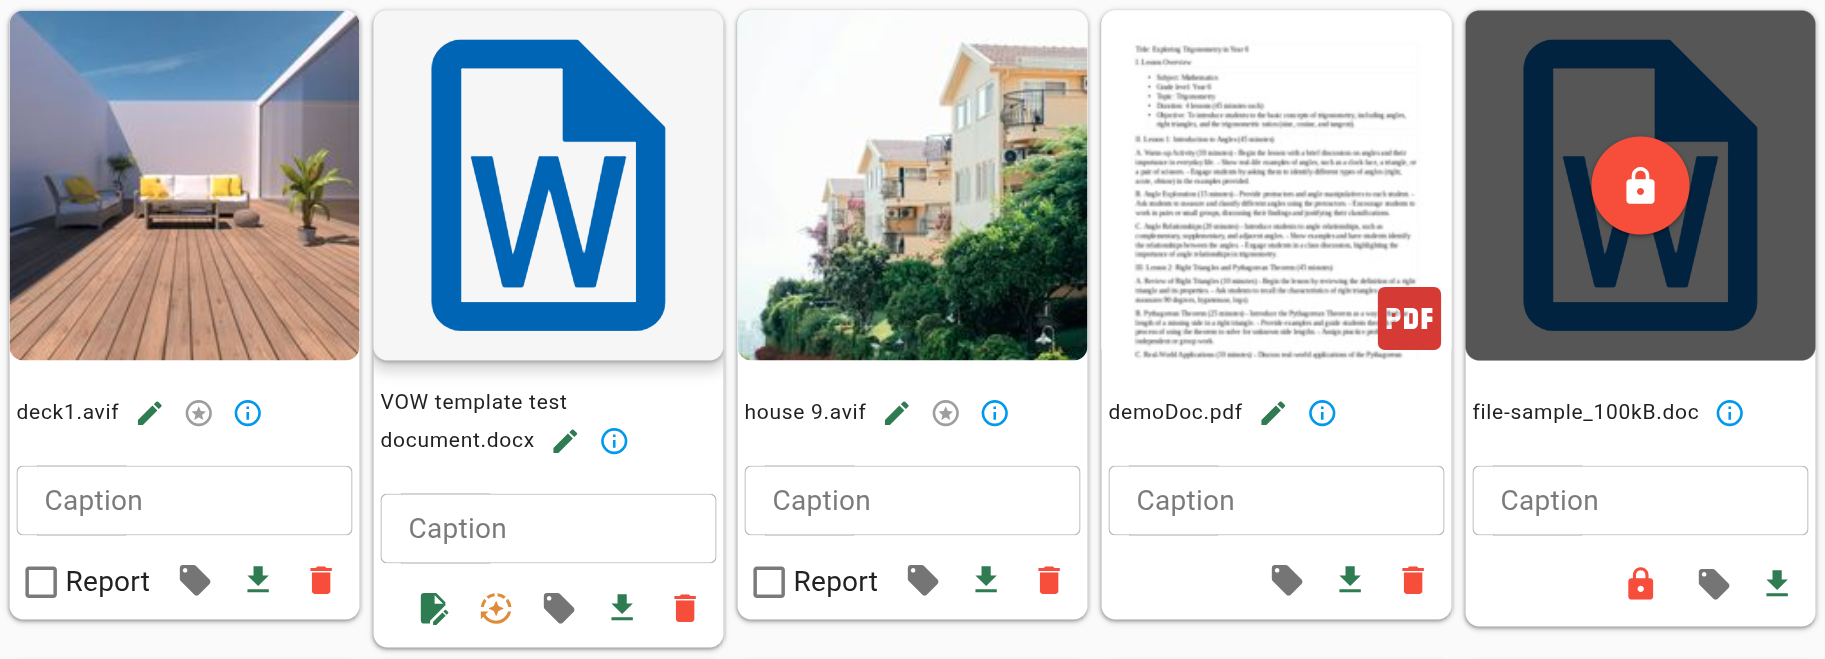
Captioning photos for the report
In folder view, photos in the report carry an In report badge, and the list view has an In report column.
Set the hero image
The hero image is the job's main photo. A report template places it wherever its Hero image field sits, such as the cover.
- On the photo's card, click the button beside the file name. In folder view, right-click the photo and choose Set as hero image.
- The star fills amber. There is only ever one hero image. Choosing a different photo later moves the star to it.
- Click Save.
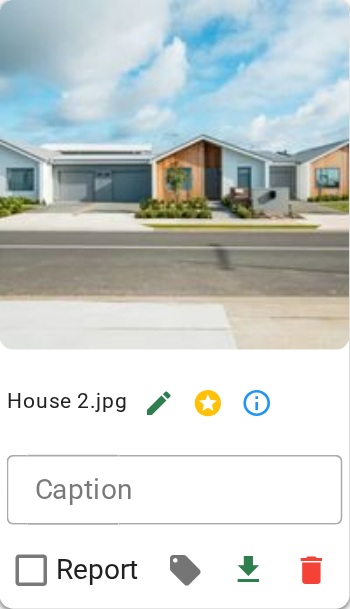
What you should see
Each report photo has a caption and a ticked Report box, and one photo has the amber star. In folder view their thumbnails carry a report badge, and the hero image a star badge.
Next
Go back to Working with attachments for the lesson list, or on to the next module in VOW tutorials. For every control on a card, see Attachment panels.