

Set up users
Included with every subscription
Add a user for each person who will work in VOW. When you save a user, VOW emails them an invitation to set their password, so do this step last. Use this page later when a person's roles change, when they become an administrator or when they leave.
Before you start
For each person, have their work email address, name and phone number ready. For valuers, also have their API registration number, their qualifications and an image of their signature.
Administrators can do everything on this page. Anyone else needs Assign roles to users to change a user's roles.
Add a user
- Open Settings | Users.
- Click New user. If your subscription is charged per user, VOW shows the extra cost first. Click Yes, I'm sure to continue.
- On the Details tab, enter the Username/Email address. This is the address they sign in with.
- Enter their First name, Last name and Phone number.
- Choose their Branches. To add a missing branch, click Edit list at the bottom of the dropdown, then New item.
- Open the Security tab and tick the user's roles. The default role is already ticked.
- Click Save user.
- Check the spelling of the username in the confirmation dialog, then click Yes, I'm sure. You cannot change a username once the user is created, only their contact email address.
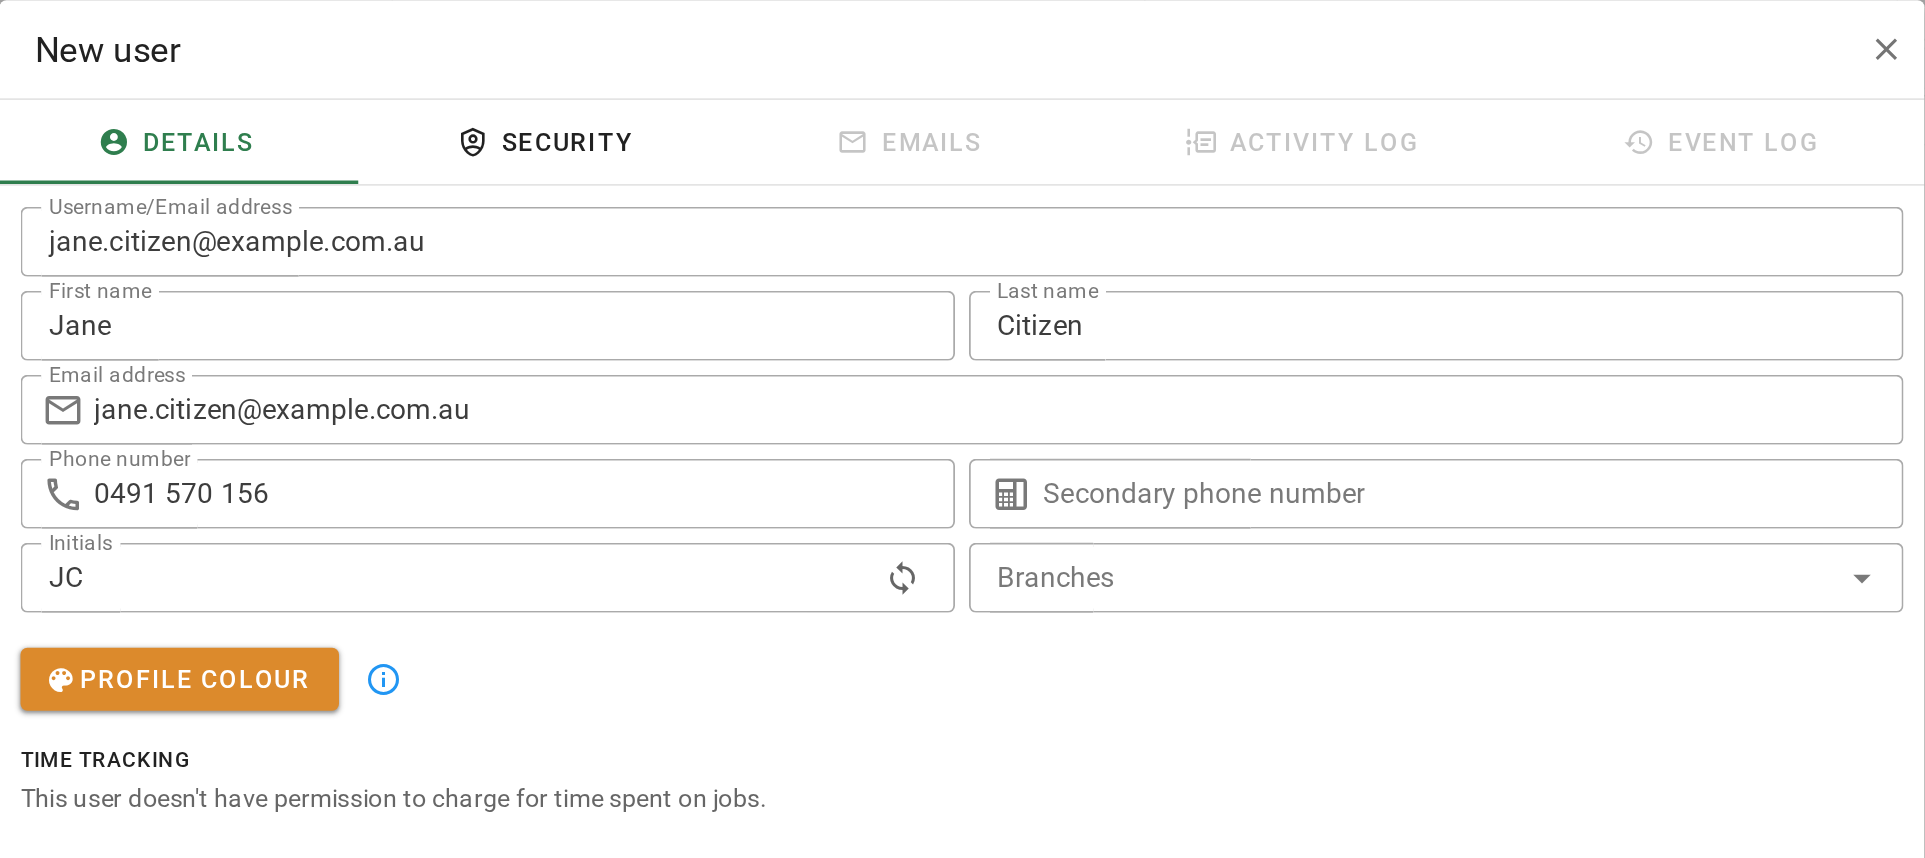
Adding a user
VOW sends the new user an invitation email. They click the link in it to set their password. The first time they sign in, VOW asks them to set up two-factor authentication with an authenticator app on their phone. Tell them to have the app ready.
The invitation link works for 24 hours. If it expires, open the user, go to the Security tab, click Invalidate password, then click Invalidate. Leave Send a password reset link ticked, and VOW emails them a new link.
Add a valuer's details
A valuer's registration number, qualifications and signature appear on their valuation reports. Add them after you save the user, because you cannot upload a signature until the user exists.
- In Settings | Users, click the button beside the valuer.
- Under Valuer details, enter the API registration number.
- Enter the Valuer qualifications, one per line.
- Under Signature image, click Upload and choose the valuer's signature.
- Click Save user.
Adding a valuer's details
The valuer details only appear for users with a valuer role. If you cannot see them, open the Security tab and check the user has the Valuer role.
See a user's roles
When someone cannot see a page or a button, check which roles they have. What each role allows is in Set up roles.
- Open Settings | Users.
- Find the person in the list. The Roles column shows every role they have. Administrator there means they can do everything.
- To see the same thing in the editor, click the button beside them and open the Security tab. Their roles are the ticked boxes under Roles.
- Click Cancel to close without changing anything.

Seeing a user's roles
Give a user another role
If everyone in a group should have a permission, tick it on the role they share, in Set up roles. If only one person should have it, give them a role that carries it. For example, an office manager who also prices quotes the way valuers do. Add the role first if it does not exist yet. Ticking a permission on User for one person gives it to the whole office.
- Open Settings | Users and click the button beside the person.
- Open the Security tab.
- Tick the extra role under Roles. Their existing roles stay ticked, and they keep everything those roles allow.
- Click Save user. The person has the new access the next time they refresh VOW.
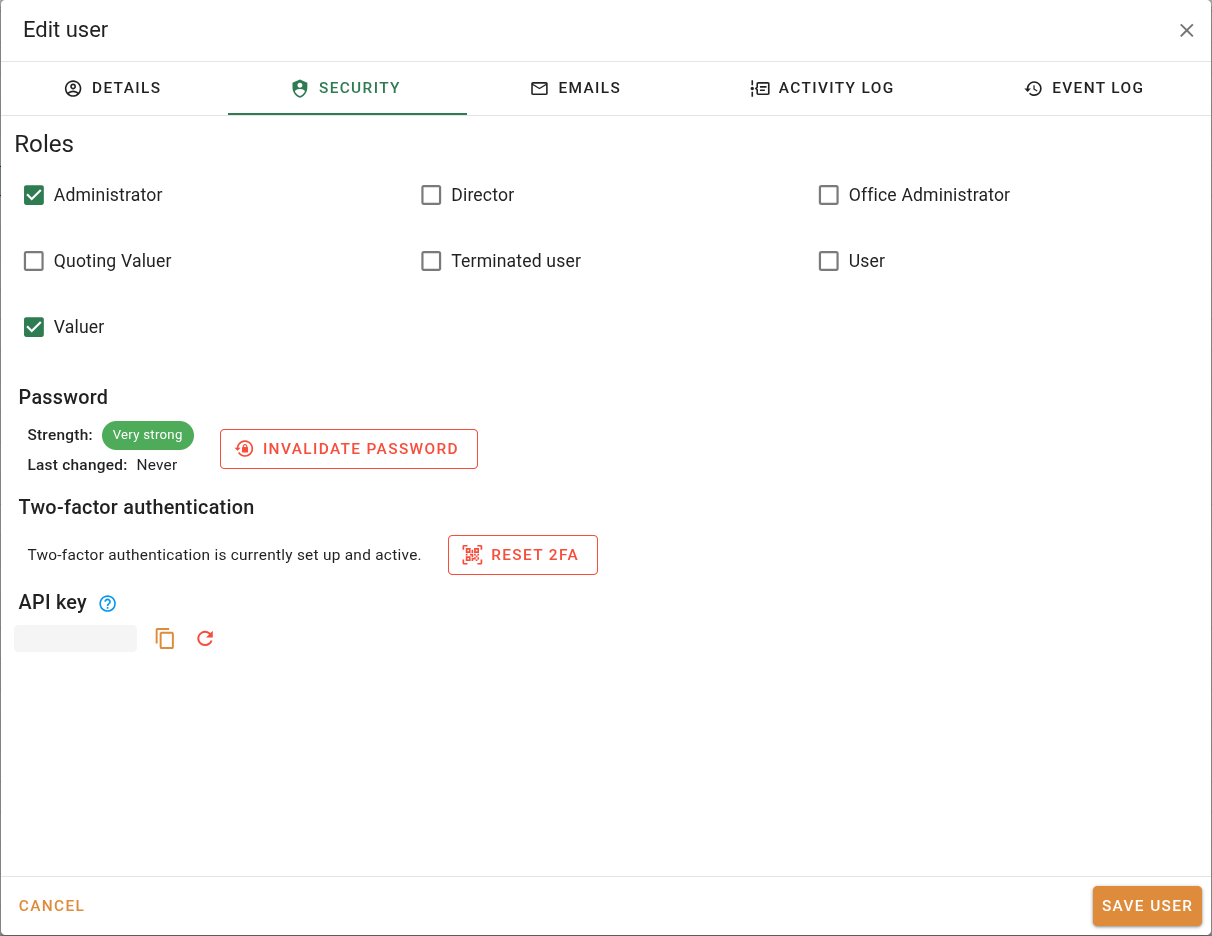
Giving a user another role
Ticking Valuer does more than add permissions. People with a valuer role appear in the valuer dropdowns on jobs and quotes and get the valuer details fields on their user record. Give it only to valuers.
Take a role off a user
Taking a role off one person affects only them. To take a permission from everyone with a role, untick it on the role instead, in Set up roles.
- Open Settings | Users and click the button beside the person.
- Open the Security tab and untick the role.
- Click Save user.
Taking a role off a user
Leave every user with at least one role. A user with none can sign in but cannot see or do anything.
Make someone an administrator
Administrator allows everything, including every settings page, and cannot be edited. Keep a second administrator at all times. VOW does not let you take the role off the last one.
- Open Settings | Users and click the button beside the person.
- Open the Security tab and tick Administrator.
- Click Save user. Administrator now shows in their Roles column in the users list.
Making someone an administrator
An administrator sees every record, changes every setting and manages every user, including resetting passwords and two-factor authentication. Give the role only to the people who run the company.
When someone leaves
Do not delete the user. Their name is on jobs, quotes, time entries and the event log, and it stays readable only while the user exists. Give them the Terminated user role instead. It carries one permission, Not permitted to sign in.
- Open Settings | Users and click the button beside the person.
- Open the Security tab, tick Terminated user and untick their other roles.
- Click Save user. If your subscription is charged per user, they stop counting towards it.
Terminating a user who has left
They cannot sign in from their next request, their current session ends, and the Terminated column in the users list shows a tick. Their name still appears on everything they worked on.
If they come back
- Open the user and untick Terminated user.
- Tick the roles they should have and click Save user. If your subscription is charged per user, VOW shows the extra cost and asks you to confirm.
- They sign in with their old username. If they have forgotten their password, click Invalidate password on the Security tab to send them a reset link.
Confirm your setup
Each new user is in the users list with the right roles in the Roles column. Ask one of them to sign in to confirm their invitation arrived.
Next, go back to the setup list for the following step.
For every field in the user editor, see Users.