

Set up workflows and tasks
Included with Enterprise
A workflow is an ordered list of tasks, each with a due date. When someone adds a workflow to a job, every task appears on the job and on the dashboard of the person responsible.
Before you start
Write down the stages a typical job goes through in your company, from instruction to invoice, and who does each stage. Each stage becomes a task, and the list becomes your first workflow.
Create your tasks
A task is one stage of a job, such as a call to make, a document to review or a note to leave. Tasks are shared between workflows, so create each one once and reuse it.
- Open Settings | Tasks.
- Click New.
- Enter a Task name, such as "Confirm instructions". Staff see this name on the job and on their dashboard.
- Add a Description of what the task involves. It shows under the task name.
- Choose the Task type. Call reminds someone to phone a contact on the job. Memo leaves a note. Review attachment asks someone to check a document, such as the report. None is a plain to-do.
- Choose the Assignee. This is the person or role who gets the task on their dashboard. Choose a role rather than a person, so the task still reaches someone when staff change.
- Turn on Required for job to be completed for any task that must happen before a job is closed, such as the valuer sign-off. VOW then refuses to complete the job until the task is done.
- Click Save.
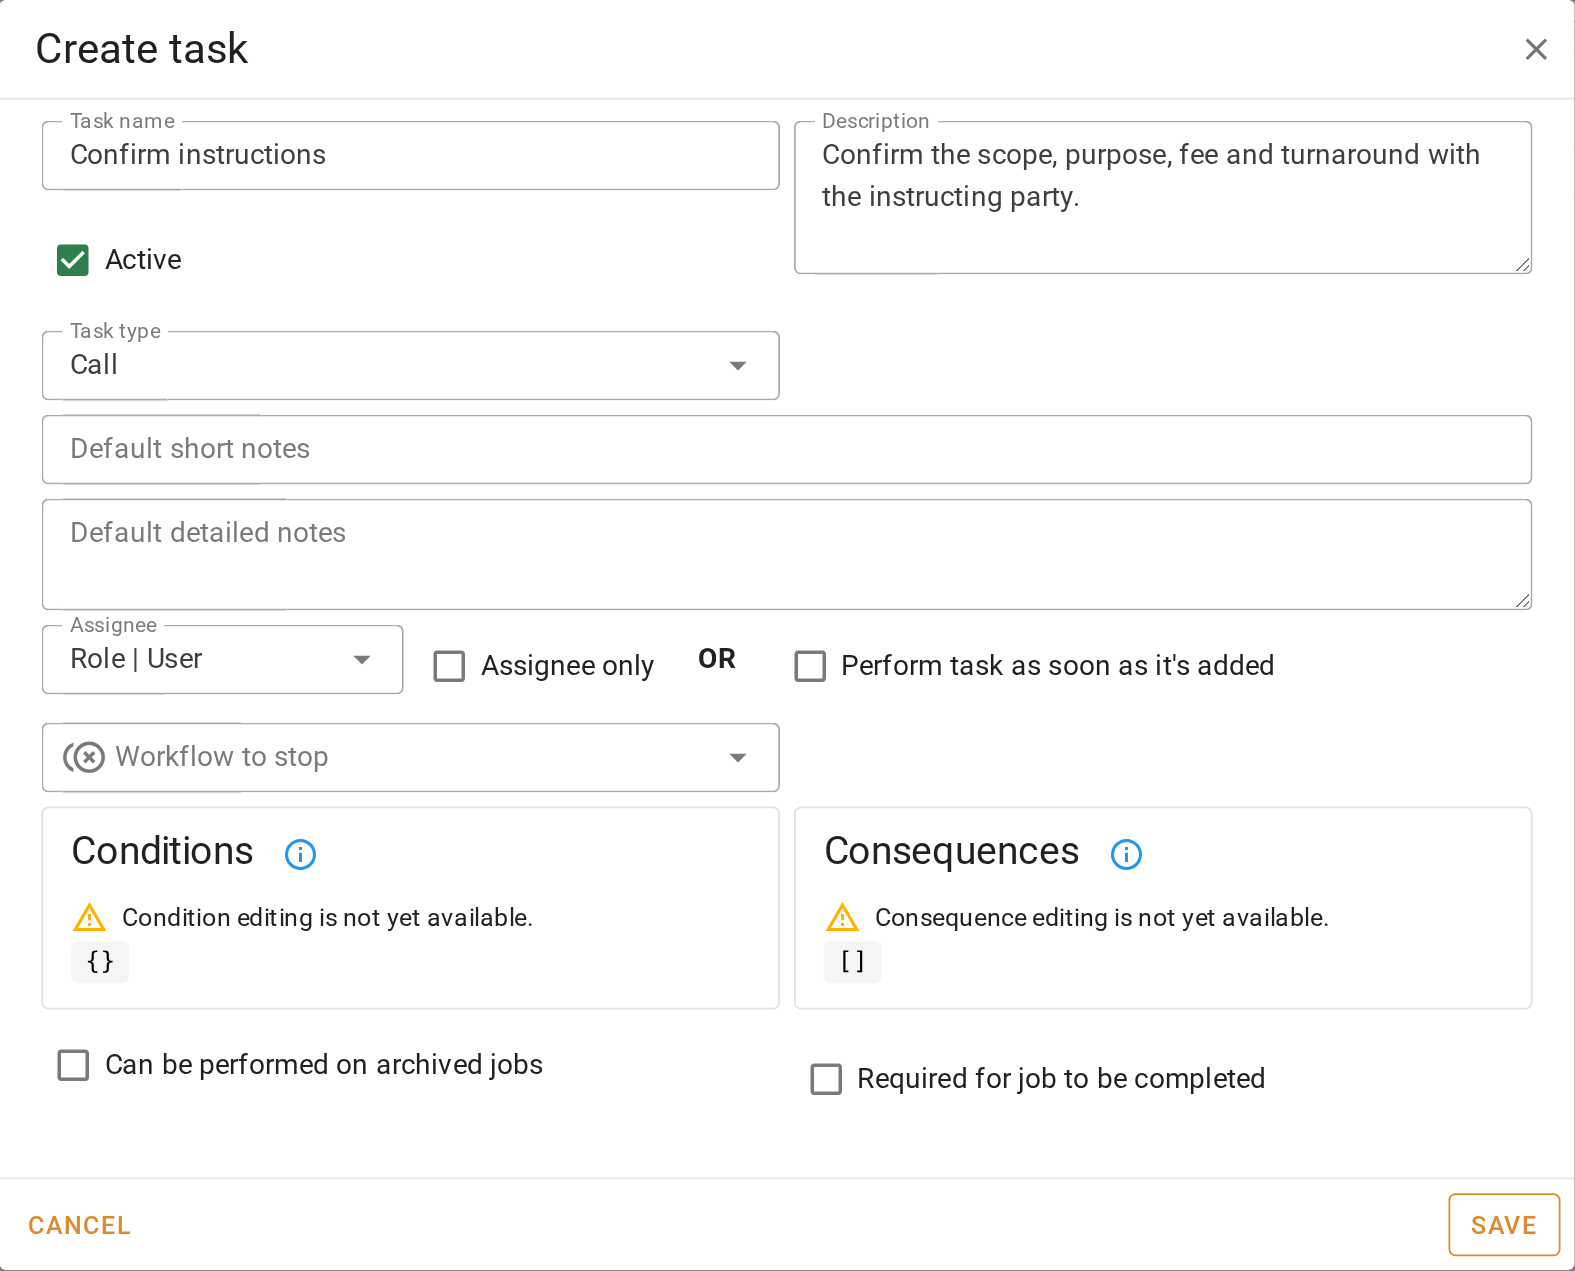
Repeat for each stage.
Creating your tasks
A task cannot be deleted while a workflow uses it. To retire a task, open it and turn off Active. Tasks with the type Email send a template automatically, so they only work once email integration is set up and a template is chosen on the task.
Create your workflows
- Open Settings | Workflows.
- Click New.
- Enter a Workflow name for the kind of job, such as "Residential valuation". Staff pick from this name when they add a workflow to a job.
- Add a Description if the name needs explaining.
- Click + Add tasks. Click the button beside each task, in the order the job goes through them.
- Set the Offset days on each task to match your usual turnaround. This is the number of days after the workflow starts that the task falls due.
- Click Add tasks, then Save.
- Staff add a workflow to a job through a task of the type Start workflow. Open Settings | Tasks, click New, name the task after the workflow and choose the Task type Start workflow.
- Under Workflow to start, choose your workflow, then click Save.
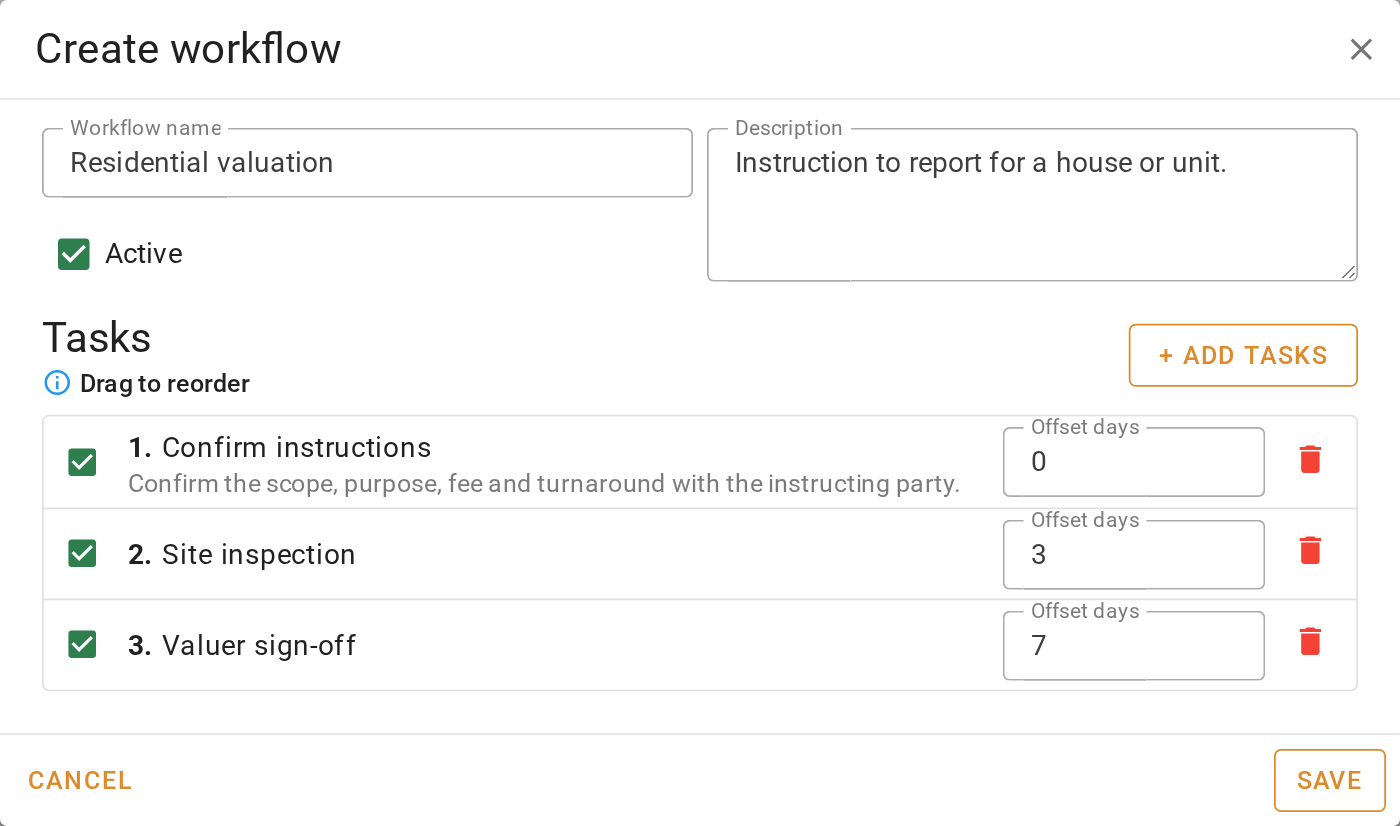
Make a workflow and a Start workflow task for each kind of job you do. To set the order staff see them in, click Reorder, drag your most common workflows to the top, then click Save order.
Creating a workflow
Run a workflow on a test job
- Open a job, or create a test one.
- On the Workflow panel, click Add workflow and choose one of yours.
- Check that the tasks appear in the order you expect, with sensible due dates, and that each one is assigned to the right person or role.
- Complete the first task. The next one becomes current.
Running a workflow on a test job
Confirm your setup
The tasks list holds every stage your jobs go through, and the workflows list holds one workflow for each kind of job. A test job with a workflow added shows its tasks on the Workflow panel. The first task appears in the dashboard's Task summary for the person it is assigned to.