

Working with valuations
The valuation editor
The valuation editor is a popup or a page that contains a collection of tabs. Each tab contains one or more panels that in turn contain either edit fields, controls or information displays. The tabs in the valuation editor are:
- Details
- File
- Summary
- Risk
- Value
- Land
- Building
- Improvements
- Sales Evidence
- Comments
- Attachments
- Notes
- Report
- Other jobs
- Event log
Each of these tabs will be discussed in more detail below.
If enabled for your company, there may be a workflow panel on the right that you can expand.
Editor tools
The valuation editor has some tools at the top of the page:
- Google Maps
 button - click to view the property in Google Maps in a new tab.
- Google Search
 button - click to open a new tab and search for the property's addressin Google.
 button - click to choose SDT Explorer or SIX Maps. Each opens the property in a new tab. Only visible for NSW addresses.
- button - click to view the property in VOW Maps, or press Alt+M.
- Click the Actions button to show a popup menu with the following options:
- Preview job report - opens a PDF in a new tab with an API PropertyPRO pro forma report
- Print job summary - opens a PDF in a new tab showing a job sheet
- Import job data - opens a popup that will let you find a previous job from which you can import information. If the valuation has unsaved changes, you are asked to save them first. When Client details, Job attachments or Sales evidence is ticked, an Append / Replace choice appears under it. Append is the default and adds the other job's items to what the valuation already has. Contacts, sales and leases already on the valuation are not added twice, a file with the same name as one already in the same folder is added as
name (2), and a folder with the same name as an existing folder is merged into it. Under Append, the valuation's evidence search settings are kept, and an appended photo is not made the hero image when the valuation already has one. Replace swaps the valuation's items for the other job's. Photos from the other job's attachments only appear in an imported Report when Job attachments is also ticked. - Import freeform data - opens a popup where you can paste text about the job and choose which of the values found in it to import. Only shown on a saved valuation, when AI features and freeform data import are turned on for your organisation. If the valuation has unsaved changes, you are asked to save them first. See Importing freeform data.
- Send email - opens a popup that will let you send an email to people associated with the job. See Email composer for more information
- Sign off on job - indicates that you've approved the job to be marked as complete. Makes your signature available for use in reports made with the long form editor.
- Click the Save button to save any changes you've made to the job. If there is something that prevents the job from being saved, the system will pop up a message to let you know what's missing.
Details
Valuation details
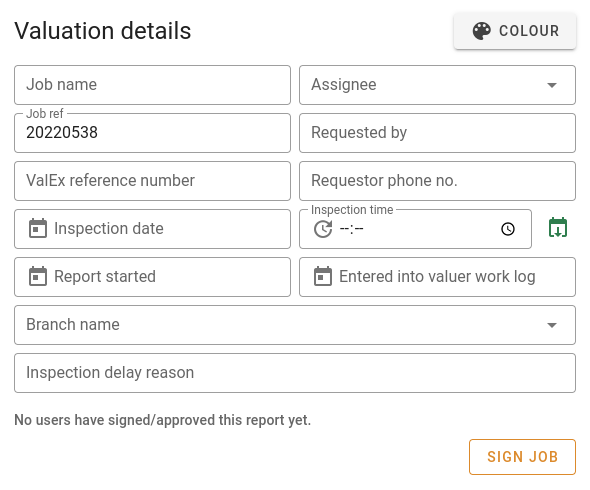
| Field | Description |
|---|---|
| Job name | The name of the job. If entered, this will be displayed in the valuation table, and in the valuation column view on the job card instead of the address. |
| Assignee | The user to whom this job is assigned. This user is distinct from the responsible and supervising valuers. |
| Job ref | The number identifying the job. It shows up in searches and is used as the internal reference number. |
| Requested by | The name of the person requesting the job. |
| ValEx reference number | Self-explanatory. |
| Requestor phone no. | Contact number for the person requesting the job. |
| Inspection date | The date the valuer inspected the property. This field and the inspection time show up on reports. |
| Inspection time | The time the valuer inspected the property. |
| Report started | This field is purely documentary. |
| Entered into valuer work log | This field is purely documentary. |
| Branch name | The branch with which the job is associated. The branch name shows up in searches, the valuation table and column views, and is also associated with bank accounts for invoicing. |
| Inspection delay reason | This field is purely documentary. |
| Sign job (button) | Clicking this button will show a popup asking you to confirm that the job is to be signed. |
If the job was created from another system, an Imported from line shows a chip for each system with the job's id in that system, for example MVOW tenure 678. Where the system has a page for the record, click the chip to open it in a new tab.
Internal notes
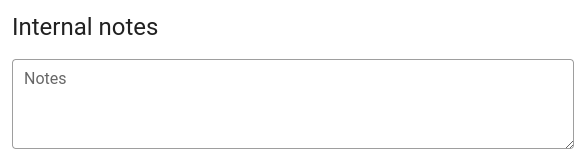
The internal notes entered here are searchable, and will also show up on the job summary report.
Notifications/memos
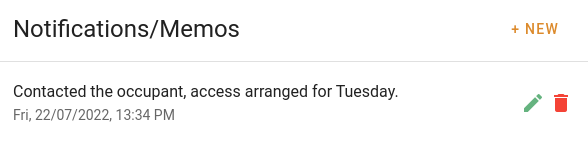
Click the + New button to add a new notification or memo. The system will show you this popup:
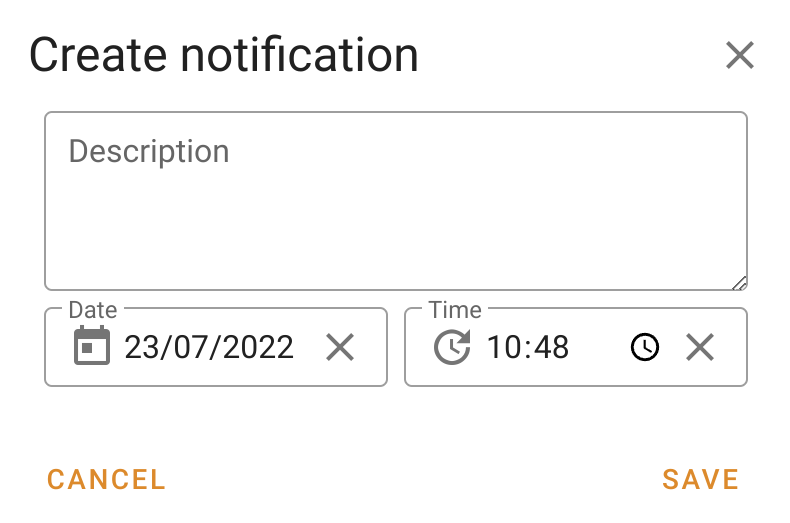
| Field | Description |
|---|---|
| Description | The text you want to keep as the notification or memo. |
| Date | The date you want to keep as the notification date. This defaults to today's date. |
| Time | The time you want to keep as the notification time. This defaults to the current time. |
Click Cancel to close the popup without keeping the note; click Save to add the note to the list.
Address
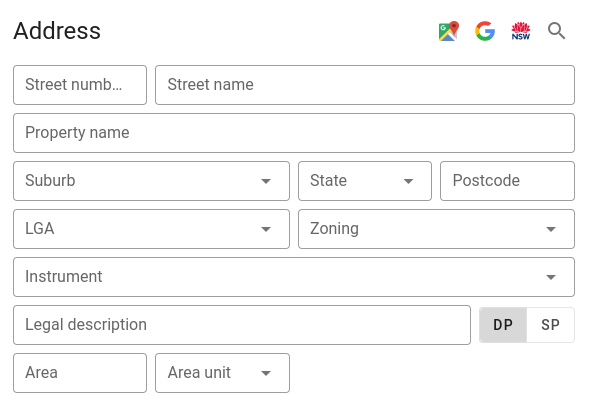
The address panel has the following buttons available for mapping:
- Google Search button - click to open a new tab and search for the property's addressin Google.
- button - click to view the property in VOW Maps, or press Alt+M.
- button - click to choose Google Maps, SDT Explorer or SIX Maps. Each opens the property in a new tab. SDT Explorer and SIX Maps are only visible for NSW addresses.
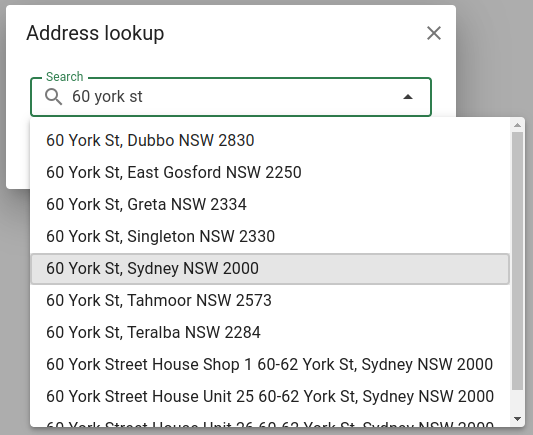
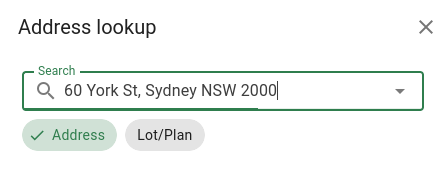
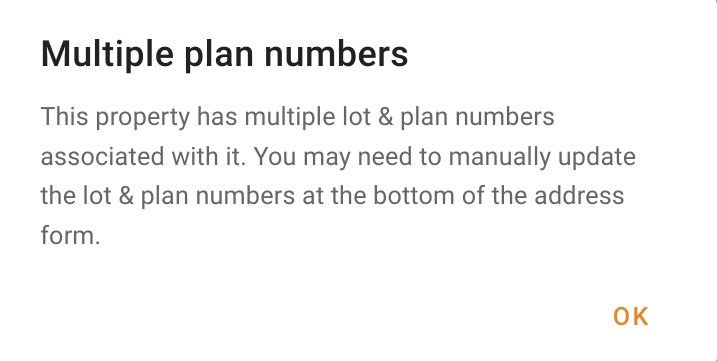
There is also a Search button. Click this button to search for an address. You'll see a popup into which you can type an address. As you type, the system will show you a list of matching address. Choose one to make it this job's address.
| Step 1 | Step 2 | Step 3 |
|---|---|---|
 |  |  |
After choosing the address information above, the address panel will look like this:
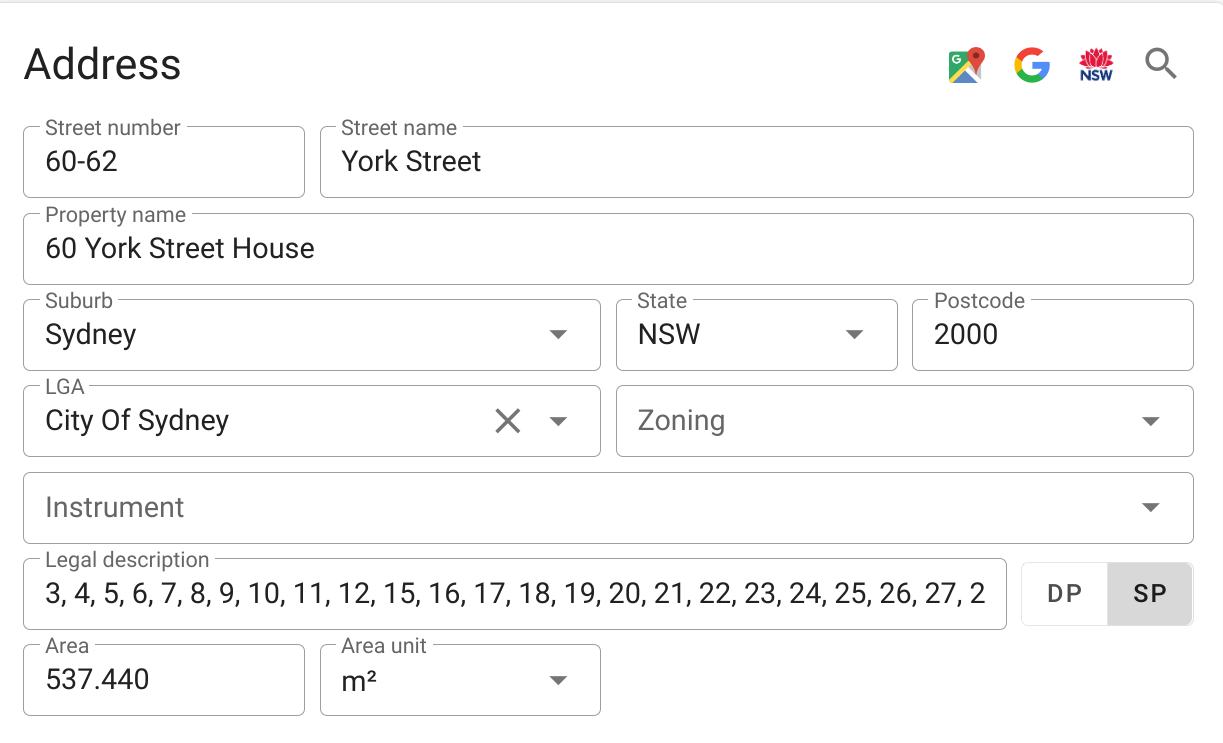
The lookup will automatically fill in the address, the property name, the suburb, state, postcode, LGA, legal description and area.
Alternatively, you can enter all of these values yourself.
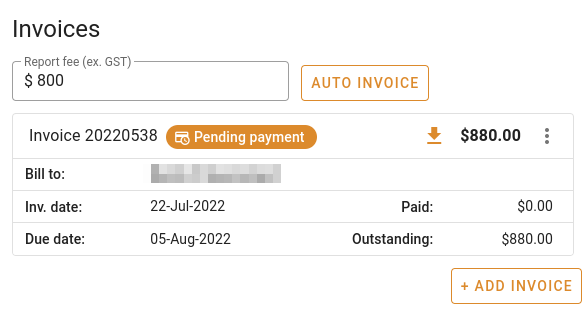
Invoices
| Field | Description |
|---|---|
| Report fee (ex. GST) | The total fee for this valuation, excluding GST. |
Click Auto invoice to create a new invoice for the job's client to the value of the report fee above.
Click + Add invoice to create an invoice for the job. When you click this button, you'll see this popup:
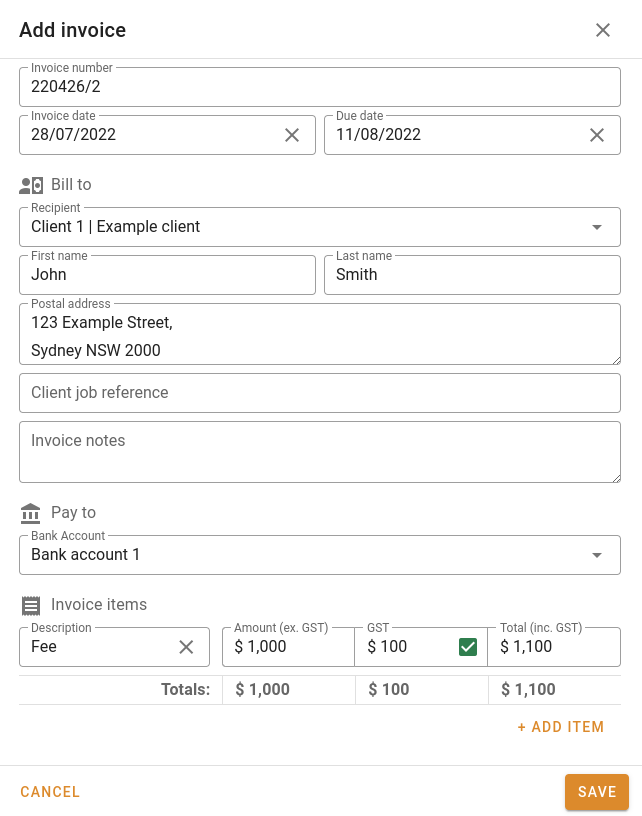
Fields for the invoice editor
| Field | Description |
|---|---|
| Invoice number | The invoice number for this invoice. The system will automatically generate the invoice number from the job number, and will append a slash and a sequence number if this is not the first invoice. |
| Invoice date | The date the invoice is created. The system will automatically populate this field with today's date. |
| Due date | The date the invoice is due. The system will automatically set this based on Settings | System | Company | Invoice payment period (which defaults to 14 days when the company is first set up). |
| Bill to recipient | The client to the invoice should be presented. |
| Bill to first name | The first name of the client's contact. |
| Bill to last name | The last name of the client's contact. |
| Bill to postal address | The client's postal address. |
| Pay to bank account | This field is a dropdown from which you can select the bank account into which the payment should be paid. This bank account's information will be displayed on the invoice. |
| Invoice item description | Defaults to Valuation fee, but editable by the user. |
| Invoice item amount (ex. GST) | The user can enter the invoice amount here, and this amount may be less than the total outstanding report fee. The user can enter a percentage including % to have the field set to that percentage of the report fee. For example, if the report fee is $800, entering 50% and leaving the field will have the invoice fee changed to $400. |
| Invoice item GST | If the box is ticked, the system will set this field to 10% of the value in the Amount field. If the box is not ticked, the field will be set to zero. Users can't change the value in this field. |
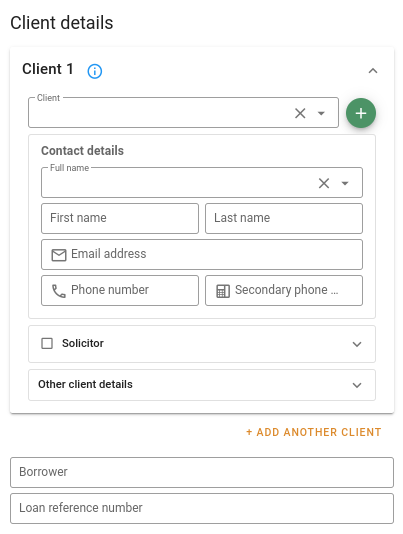
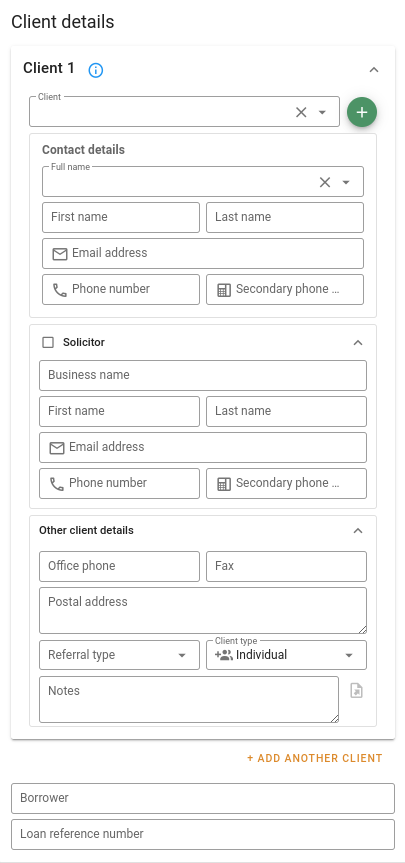
Client details
| Default view | Expanded view |
|---|---|
 |  |
| Field | Description |
|---|---|
| Client | A dropdown from which you can choose the client. Start typing the name of the client or any of the client's contacts, and you'll see client names you can choose from the dropdown. The items in the dropdown include the client company name and the individual contacts' names. If the client is not in the system, you can click the Add client button (see below). Click Clear  to remove the client. |
| Contact business name | Populated by the system if you choose a known client. |
| Contact first name | Populated by the system if you choose a known client. |
| Contact last name | Populated by the system if you choose a known client. |
| Contact email address | Populated by the system if you choose a known client. |
| Contact phone number | Populated by the system if you choose a known client. |
| Contact secondary phone | Populated by the system if you choose a known client. |
| Solicitor | Tick this box if the client is represented by a solicitor. |
| Solicitor business name | Populated by the system if you choose a known client who has a solicitor. |
| Solicitor first name | Populated by the system if you choose a known client who has a solicitor. |
| Solicitor last name | Populated by the system if you choose a known client who has a solicitor. |
| Solicitor email address | Populated by the system if you choose a known client who has a solicitor. |
| Solicitor phone number | Populated by the system if you choose a known client who has a solicitor. |
| Solicitor secondary phone | Populated by the system if you choose a known client who has a solicitor. |
| Office phone | Populated by the system if you choose a known client. |
| Fax | Populated by the system if you choose a known client. |
| Postal address | Populated by the system if you choose a known client. |
| Referral type | Populated by the system if you choose a known client. |
| Client type | Populated by the system if you choose a known client. |
| Notes | Populated by the system if you choose a known client. |
| Borrower | If your client is a lender requesting a valuation for a property for which they're considering extending a loan, you can enter the name of the borrower here. |
| Loan reference number | If your client is a lender requesting a valuation for a property for which they're considering extending a loan, you can enter the loan reference number here. |
If the client is not in the list, you'll have to add it. Click the Add client button and add the new client as described in Adding contacts.
File
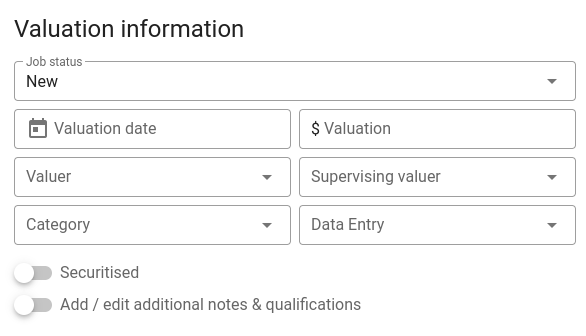
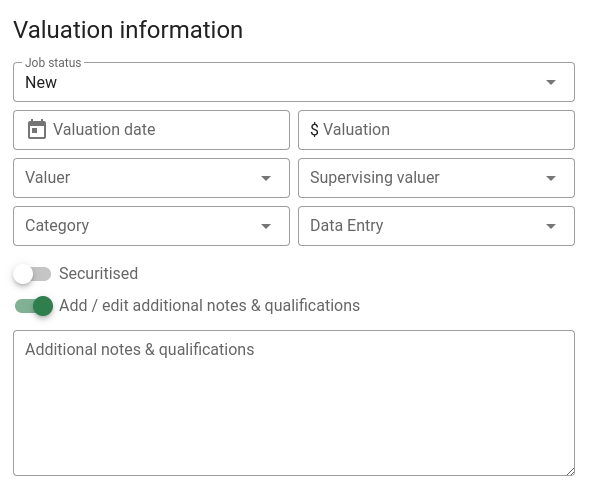
Valuation information
| Default view | With additional notes |
|---|---|
 |  |
| Field | Description |
|---|---|
| Job status | Choose the job status from the dropdown. The list of job statuses is in Settings | Lists | Job statuses. You can also change the job status by dragging it to a different column in the column view. |
| Valuation date | This is the date the valuation was made. It is searchable, and will be included in reports. |
| Valuation | This is the dollar value of the property. It is the same value as Value | Market value. If you change this value, the other will be changed immediately to keep it in sync. The market value in words will also be updated. |
| Valuer | Choose the valuer making the valuation from this dropdown. |
| Supervising valuer | If there is a senior valuer supervising another valuer, the supervisor's name can be chosen from this dropdown. |
| Category | Choose the category from this dropdown. The list of categories is in Settings | Lists | Job types. |
| Data entry | This is a date field that you can use to record when data was first entered into this or another system. |
| Securitised | This is not searchable, and only displayed in long form reports if added to a template. |
| Add/edit additional notes & qualifications | Flip this switch to expand the panel to show the addition notes & qualifications field. |
| Additional notes & qualifications | Enter addition notes and qualifications that are to be included in the report. |
Property details
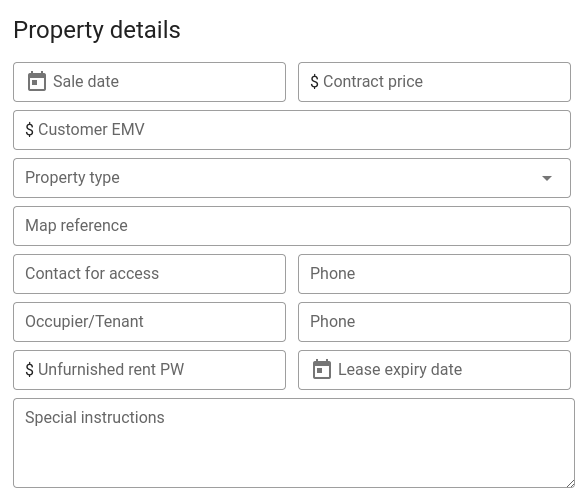
| Field | Description |
|---|---|
| Sale date | The date the subject property was sold (if applicable). |
| Contract price | The subject property's price (if applicable). |
| Customer EMV | The customer's estimate of property's market value (if applicable). |
| Property type | Choose the property type from the dropdown. The list of property types is in Settings | Lists | Property types. |
| Map reference | Enter a map reference if required. |
| Contact for access | The name of the person to contact for gaining access to the property. |
| Phone (access) | The phone number to call to gain access to the property. |
| Occupier/tenant | The name of the person or organisation current occupying the property (if applicable). |
| Phone (tenant) | The phone number of the person or organisation occupying the property. |
| Unfurnished rent PW | Weekly rent for the property. |
| Lease expiry date | Lease expiry date (if applicable). |
| Special instructions | Any special instructions about the valuation or gaining access to the property. |
Dates
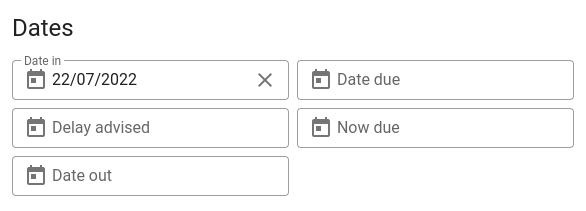
| Field | Description |
|---|---|
| Date in | The date the valuation was received and added to the system. |
| Date due | The date the valuation is due to be delivered (originally). |
| Delay advised | If there has been a delay, this is the date the delay was advised. |
| Now due | The date that the valuation is due after a delay advice. |
| Date out | The date the valuation is sent out. |
Valuation type
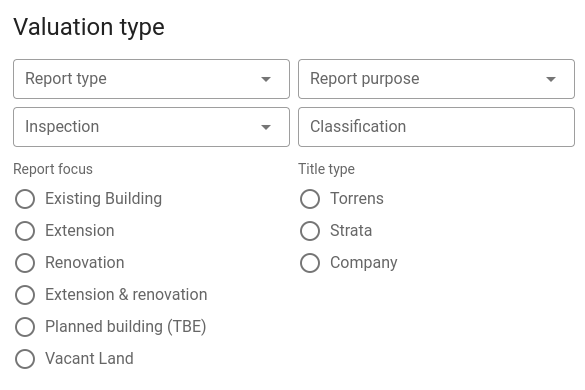
| Field | Description |
|---|---|
| Report type | Choose the report type from the dropdown. The list of report types is in Settings | Lists | Report types. |
| Report purpose | Choose the report type from the dropdown. The list of report types is in Settings | Lists | Valuation purposes. |
| Inspection | Choose one of Internal and external, Internal, or External. |
| Classification | This is not searchable, and only displayed in long form reports if added to a template. |
| Report focus | This is not searchable, and only displayed in long form reports if added to a template. |
| Title type | This is not searchable, and only displayed in long form reports if added to a template. |
Summary
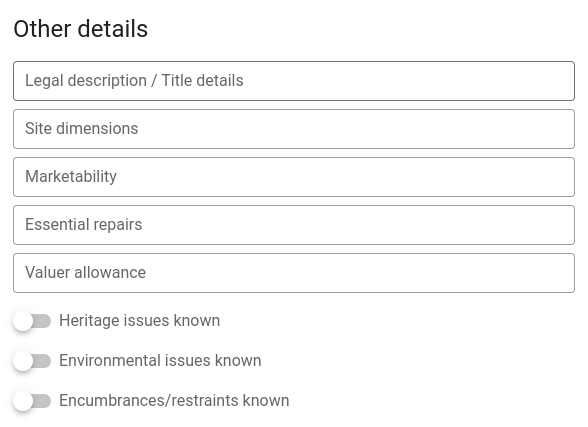
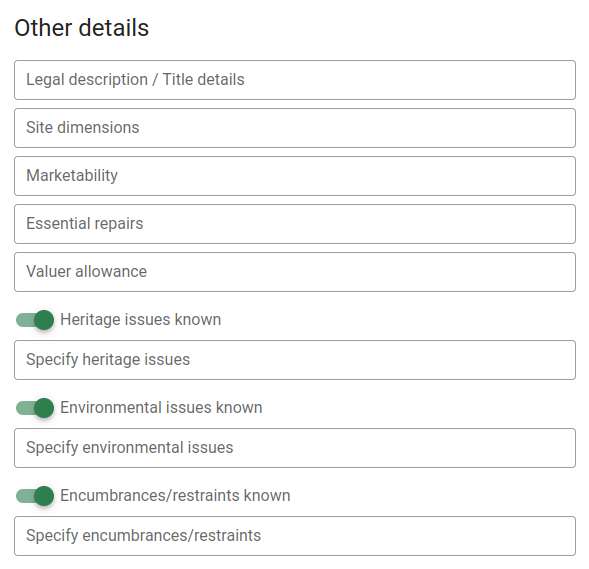
Other details
| Closed | Expanded |
|---|---|
 |  |
| Field | Description |
|---|---|
| Legal description / title details | The legal description from the address will appear here. If you change this value, it will be reflected in the address's legal description field. |
| Site dimensions | Enter the site dimensions here. |
| Marketability | Enter comments about the marketability of the property here. |
| Essential repairs | Note any essential repairs in this field. |
| Valuer allowance | If there has been any allowance applied to the property by valuer, it should be noted here. |
| Heritage issues known | Switch this on to indicate that there are known heritage issues. |
| Heritage issues | If there are heritage issues, record them in this field. |
| Environmental issues known | Switch this on to indicate that there are known environmental issues. |
| Environmental issues | If there are environmental issues, record them in this field. |
| Encumbrances/restraints known | Switch this on to indicate that there are known encumbrances and/or restraints. |
| Encumbrances/restraints | If there are encumbrances and/or restraints, record them in this field. |
Risk
Property / market risk rating
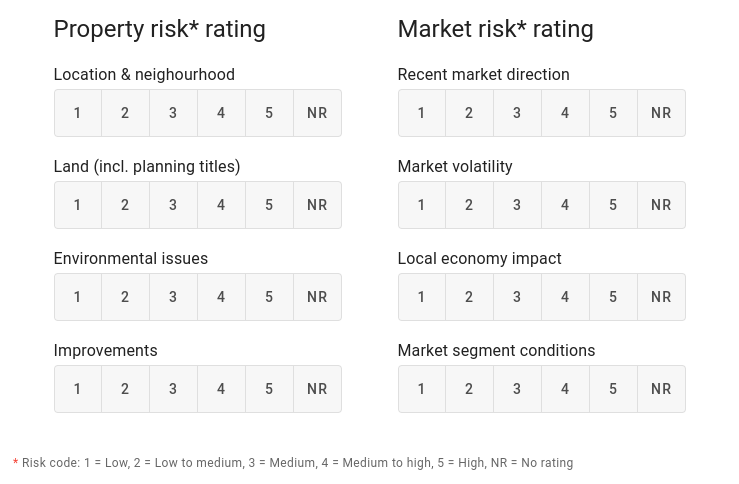
For each category, click on a number representing the risk related to that category. If the risk is above "3" you will have the opportunity to comment on that risk in the adjacent panel.
Risk comments
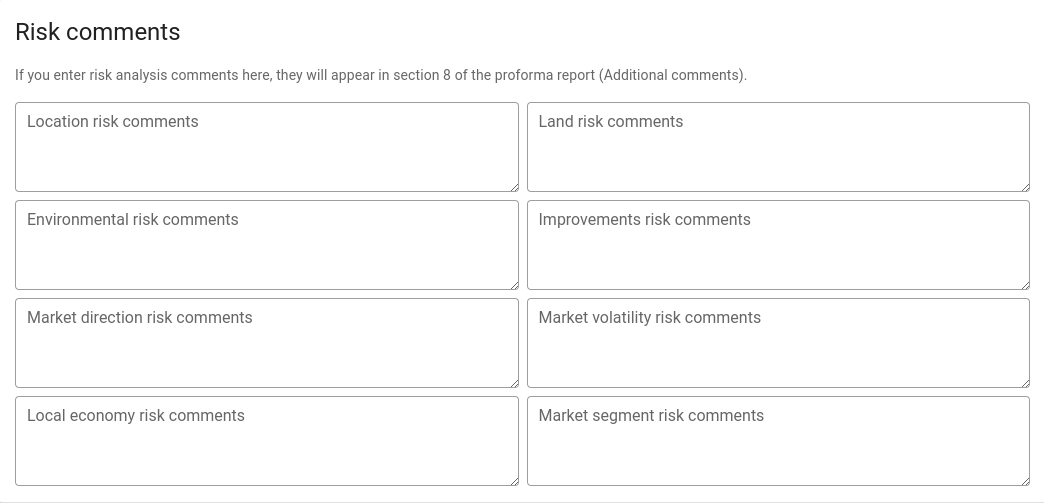
These fields only appear if there is a corresponding risk rating of "3" or greater in the Property / market risk rating panel.
Value
Valuation summary
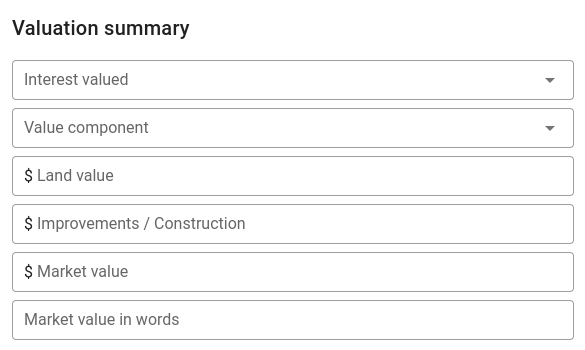
| Field | Description |
|---|---|
| Interest valued | Choose the interest valued from the dropdown. The list of interests valued is in Settings | Lists | Interests valued. |
| Value component | Choose either Existing property or As if complete from the dropdown. |
| Land value | Enter the land value here. |
| Improvements / construction | Enter the value of any improvements here. |
| Market value | This value will automatically be set to the sum of the land value and the improvements, but you're able to enter a different value into this field if you want. |
| Market value in words | This is a read-only field, with the market value in words. |
Valuation details
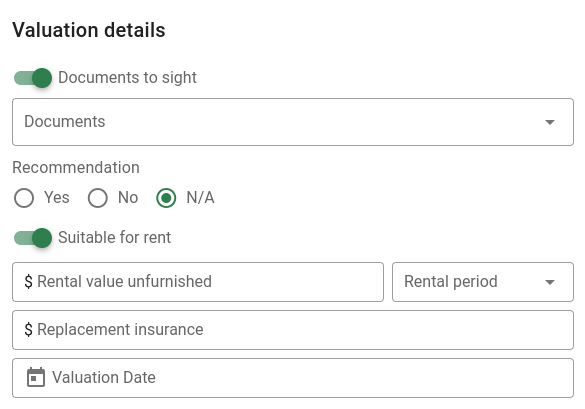
| Field | Description |
|---|---|
| Documents to sight | Switch this on if there are documents that should be sighted. |
| Documents | If there are documents to sight, you can choose them from the dropdown. The list of documents is in Settings | Lists | Document types. |
| Recommendation | For PropertyPRO reports. The decision as to the suitability of security for a lending transaction and/or a mortgage insurance transaction is a commercial decision for the lender-client/LMI. |
| Suitable for rent | Switch this on if the property is suitable for rent. If it's switched off, the Rental value unfurnished and Rental period fields will be disabled. |
| Rental value unfurnished | Rental income over the period selected in the next field. |
| Rental period | Select one of weekly, fortnightly or monthly. |
| Replacement insurance | Cost of replacement insurance. |
| Valuation date | The date the valuation was made. |
Land
Land details
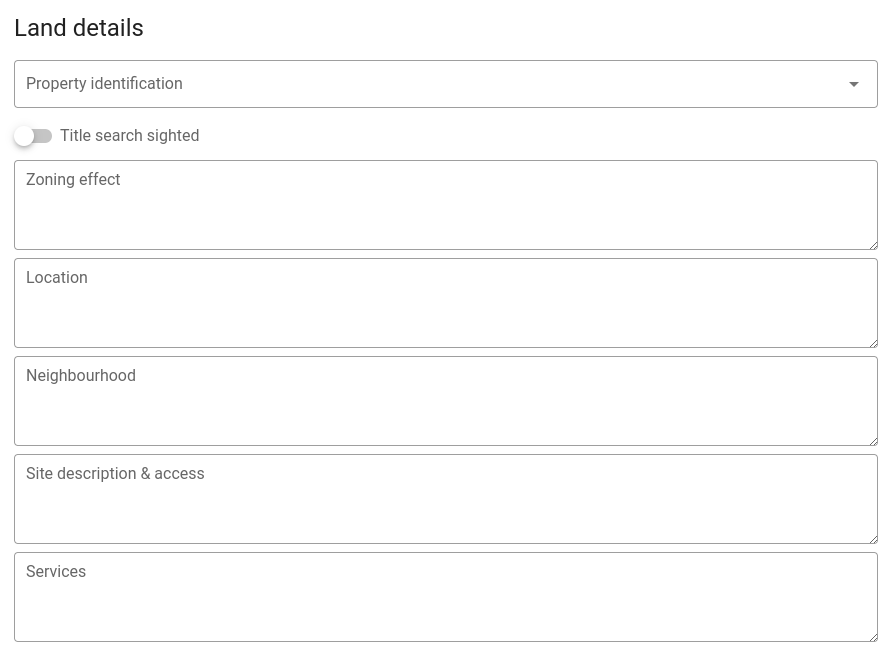
| Field | Description |
|---|---|
| Property identification | Choose the identification methods (you can choose more than one) used from the dropdown. The list of documents is in Settings | Lists | Property identification methods. |
| Title search sighted | Switch this on to indicate that the title search has been conducted. |
| Zoning effect | Enter comments about the effect the zoning has on the property's value. |
| Location | Enter comments about the location. |
| Neighbourhood | Enter comments about the neighbourhood. |
| Site description & access | Enter comments about the site and how access is gained. |
| Services | Enter comments about what services are available to the property. |
Building
Occupancies
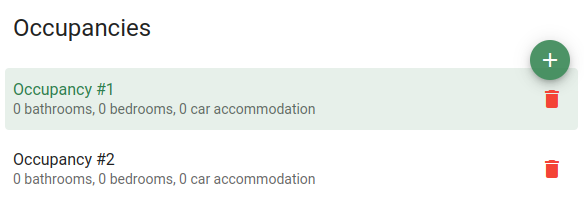
Click the Add occupancy button to add a new occupancy to the valuation.
Click anywhere in a row to select the occupancy and view its details in the Occupancy details panel (below).
Click the Delete button to remove an occupancy from the valuation.
Occupancy details
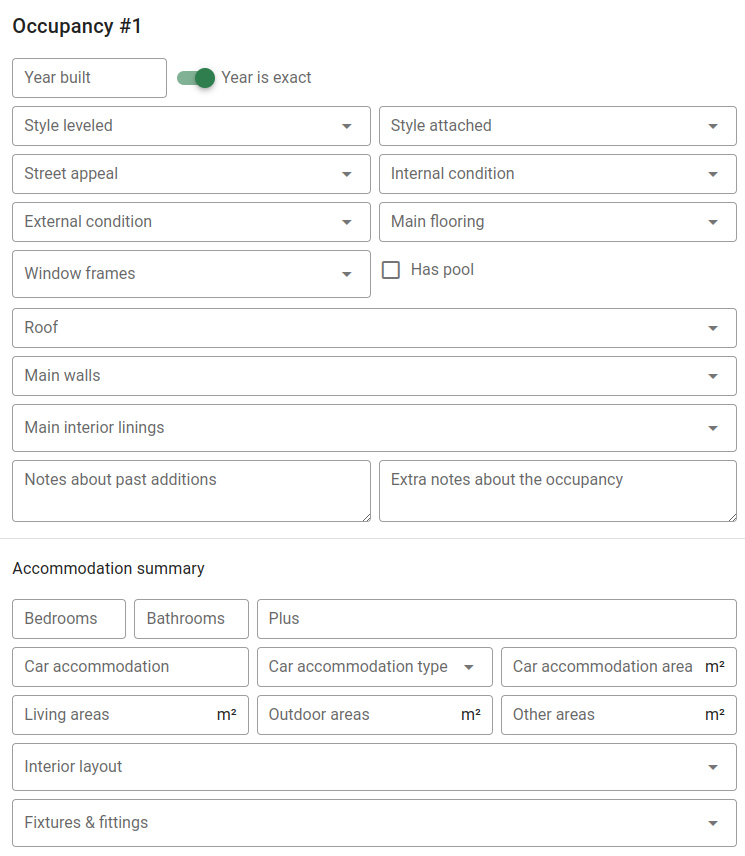
| Field | Description |
|---|---|
| Year to be erected Year built Built about | The prompt for this field is determined by whether the report type is flagged as "TBE", and whether the Year is exact switch is on. |
| Year is exact | Turning this on sets the prompt for the field above to "Year built" instead of "Built about". |
| TBE | This switch is only visible if the report type is flagged as "TBE". |
| Style leveled | Choose a single item from this dropdown. The list of items is in Settings | Lists | Levels. |
| Style attached | Choose a single item from this dropdown. The list of items is in Settings | Lists | Attachment types. |
| Street appeal | Choose a single item from this dropdown. The list of items is in Settings | Lists | Street appeals. |
| Internal condition | Choose a single item from this dropdown. The list of items is in Settings | Lists | Internal conditions. |
| External condition | Choose a single item from this dropdown. The list of items is in Settings | Lists | External conditions. |
| Main flooring | Choose a single item from this dropdown. The list of items is in Settings | Lists | Floor types. |
| Window frames | Choose one or more items from this dropdown. The list of items is in Settings | Lists | Windows. |
| Has pool | Tick the box if the property has a pool. |
| Roof | Choose a single item from this dropdown. The list of items is in Settings | Lists | Roof types. |
| Main walls | Choose a single item from this dropdown. The list of items is in Settings | Lists | Walls. |
| Main interior linings | Choose one or more items from this dropdown. The list of items is in Settings | Lists | Interior linings. |
| Notes about past additions | Enter notes about past editions here; this is a free text box. |
| Extra notes about the occupancy | Enter extra notes about the occupancy here; this is a free text box. |
| Bedrooms | Number of bedrooms. |
| Bathrooms | Number of bathrooms. |
| Plus | More information here about the accommodation; this is a free text box. |
| Car accommodation | The number of car spaces. This doesn't have to be a number. |
| Car accommodation type | Choose a single item from this dropdown. The list of items is in Settings | Lists | Car accommodation. |
| Car accommodation area | Enter the amount of car space in m². |
| Living areas | Enter the amount of living area in m². |
| Outdoor areas | Enter the amount of outdoor area in m². |
| Other areas | Enter the amount of other areas in m². |
| Interior layout | Choose one or more items from this dropdown. The list of items is in Settings | Lists | Internal layouts. |
| Fixtures & fittings | Choose one or more items from this dropdown. The list of items is in Settings | Lists | Fixtures and fittings. |
Ancillary
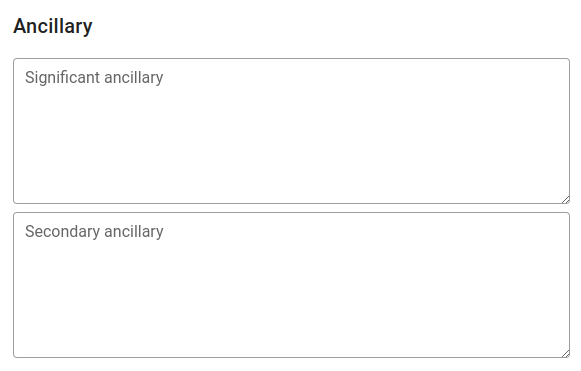
| Field | Description |
|---|---|
| Significant ancillary | Notes about significant ancillary occupancies. |
| Secondary ancillary | Notes about secondary ancillary occupancies. |
Sales Evidence
Supporting sales
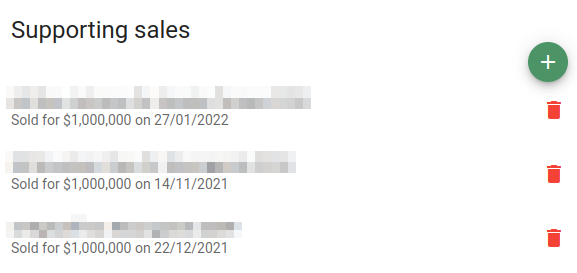
To add one or more supporting sales, click the Add supporting sales button. The system will show you a popup allowing you to select sales to use as supporting sales.
| Without filter | With filter |
|---|---|
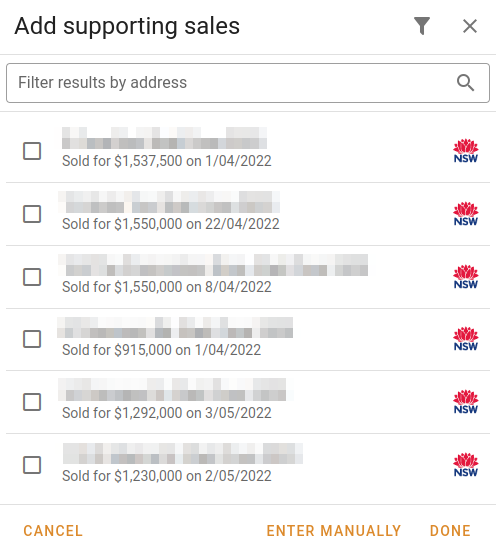 | 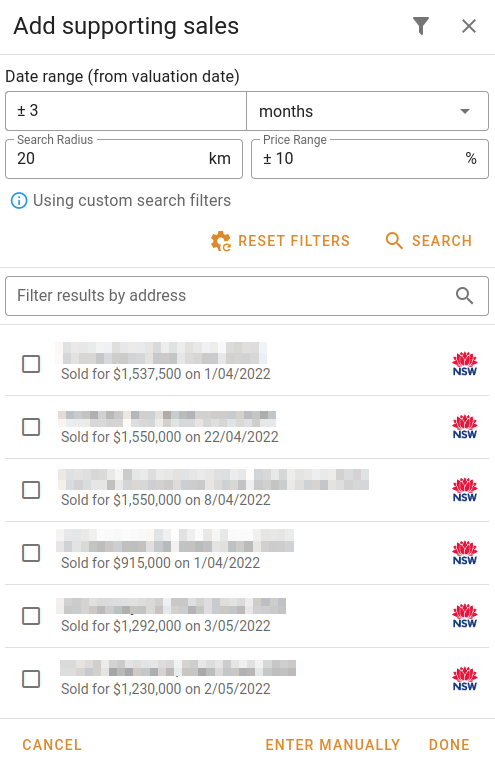 |
Click the Filter button to hide or show the extended filters.
Type into the Filter results by address to restrict the visible sales to those whose addresses contain the text you've typed. It doesn't matter whether you type in upper or lower case.
Tick the boxes next to the sales you want to include as supporting sales in this valuation.
Click Cancel to close the popup without keeping any changes.
Click Enter manually to start the process of manually entering a supporting sale (described below).
Click Done to apply your selections to the valuation.
There are two types of sales you have access to: sales that are taken from the Valuer General's website; and sales that you (or someone in your organisation) has analysed. In this case, an "analysed" sale is a sale that has been used as a supporting sale earlier, or one that has been independently analysed in the Sales module.
Sales from the VG will have the NSW logo next to them; sales you've analysed will have your company's logo next to them.
Manually entering supporting sales
If you click the Enter manually button on the Add supporting sales popup above, you'll be able to enter details about the sale yourself.
If you have enabled the AddressFinder API, you'll be able to type an address into this popup:
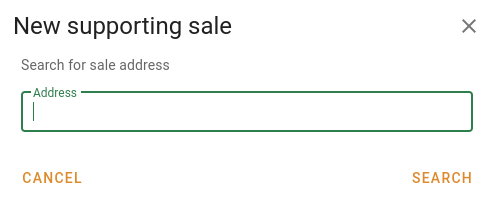
You'll see a list of matching addresses in a dropdown below the entry field, and you'll be able to choose an address from that list. When you're satisfied, click the Search button. Assuming you've found a property, you'll get this popup:
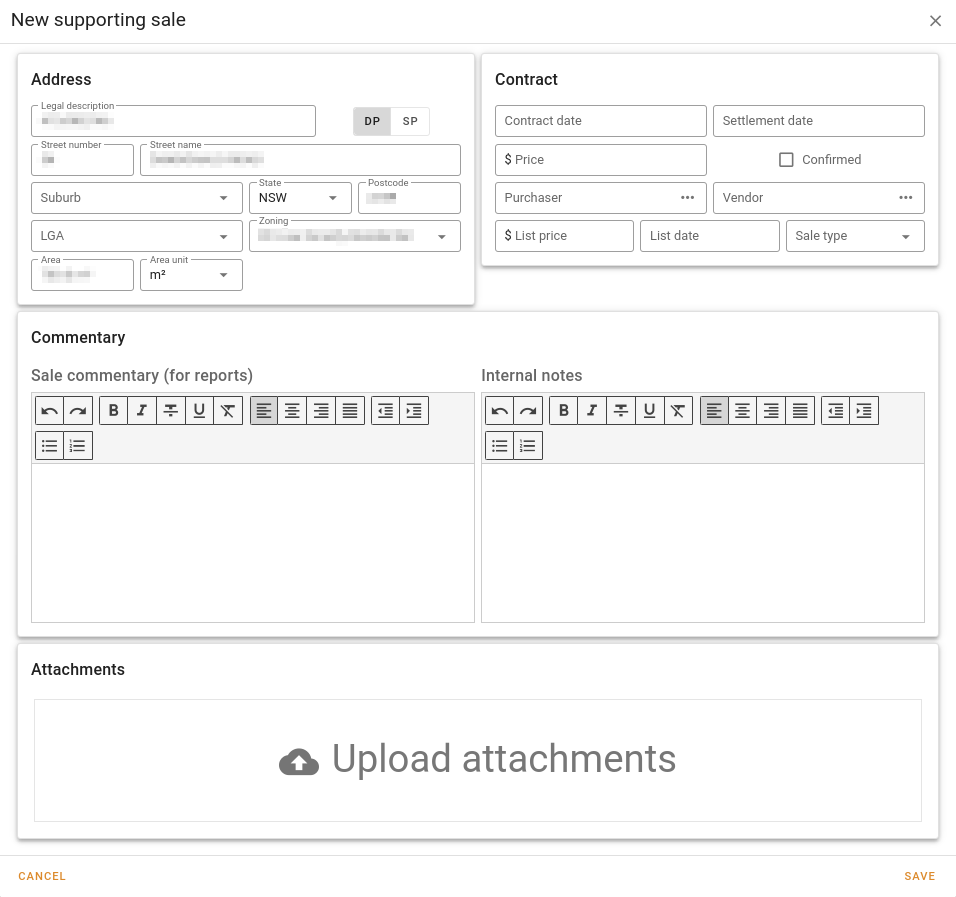
| Field | Description |
|---|---|
| Address | As for Details | Address above. |
| Contract date | The date contracts were exchanged. |
| Settlement date | The date the sale was settled (optional). |
| Price | The sale price. |
| Confirmed | Tick this box if you want to mark the sale as a confirmed sale. |
| Purchaser | The purchaser(s). Click the Ellipsis icon to open a popup into which you can enter one or more purchasers (one per line). |
| Vendor | The vendor(s). Click the Ellipsis icon to open a popup into which you can enter one or more vendors (one per line). |
| List price | The price that the sale was listed at (optional). |
| List date | The date the property was listed (optional). |
| Sale type | Choose a single sale type from this dropdown. The list of items is in Settings | Lists | Sale types. |
| Sale commentary | Enter any relevant commentary about the sale. This information will be included in reports. |
| Internal notes | Enter any internal notes about the sale. This information won't be included in reports. |
| Attachments | Drag and drop images or other documents on to this panel to attach them to this sale. |
Supporting sale details
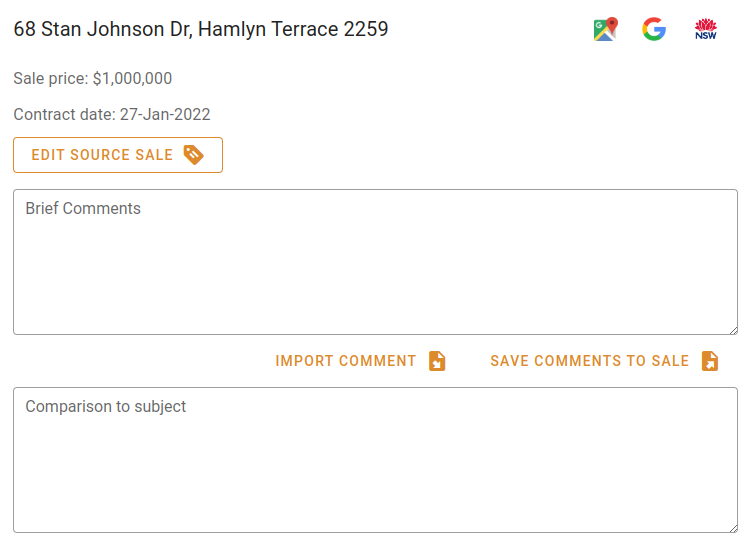
Click Edit source sale to open the sale editor.
Click Import comment to import the comment from the analysed sale to the brief comments above the button.
Click Save comments to sale to send a copy of the brief comments to the analysed sale.
| Field | Description |
|---|---|
| Brief comments | Enter comments about the property to be included in the report for this sale. |
| Comparison to subject | Enter a comparison to the property being valued. |
Prior sale(s) of subject property (last 3 years)
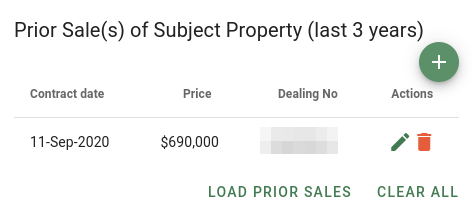
Click the Add prior sale button to add a new prior sale to the valuation.
Click Load prior sales to load the prior sales for this property. The system will only find sales with contract dates within the three years prior to the valuation date, so you must make sure you've already set the valuation date.
Click Clear all to clear the existing list of prior sales.
If you have any prior sales, click the Edit button to edit the information about the prior sale (see below).
If you have any prior sales, click the Delete button to remove the prior sale from the valuation.
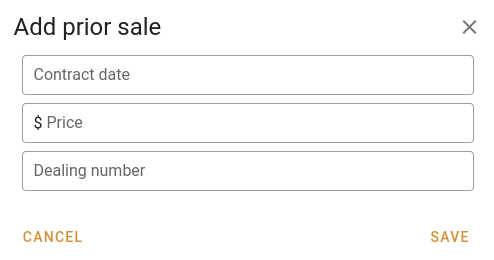
Creating / editing prior sales
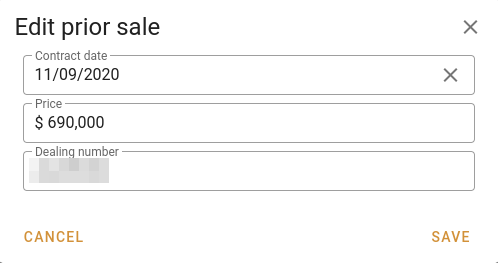
| New prior sale | Edit prior sale |
|---|---|
 |  |
| Field | Description |
|---|---|
| Contract date | Date on which the property sold. |
| Price | Price for which the property sold. |
| Dealing number | Optional value containing the VG's dealing number. If the prior sale has been pulled from the VG's sale data, this field will be set. You're not required to enter it if you're adding your own sale information. |
Current/proposed sale of property
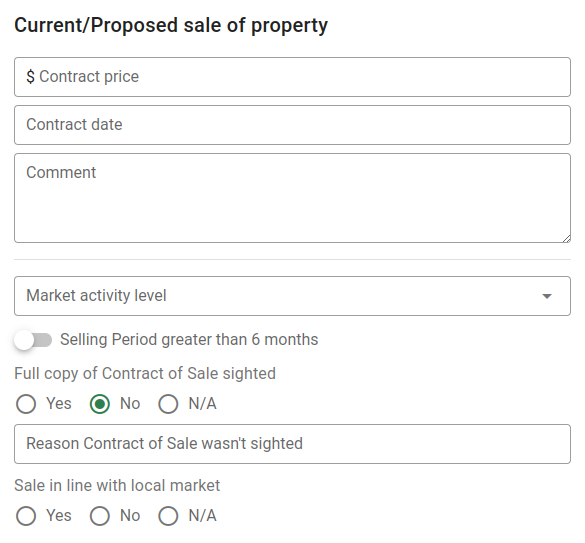
If the subject property has sold or is currently for sale, you can enter information about the sale in this panel.
| Field | Description |
|---|---|
| Contract price | The price for which the subject property sold. |
| Contract date | The contract date for the sale of this property. |
| Comment | Enter any pertinent information about the sale here. |
| Market activity level | Choose a single market activity level from this dropdown. The list of items is in Settings | Lists | Market activity levels. |
| Selling period greater than 6 months | Switch this on if the sale was on the market for a more than six months. |
| Full copy of Contract of Sale sighted | Choose Yes, No or N/A. |
| Reason Contract of Sale wasn't sighted | Enter the reason for which the Contract of Sale was not seen by the valuer. This field is hidden if the above field is Yes. |
| Sale in line with the local market | Choose Yes, No or N/A. |
Leases
The Leases panel holds the leases you use as comparable rent evidence in the valuation. It is available when your account can view leases. To show it in a tab, tick Leases in the tab's Panels menu. See Panels.
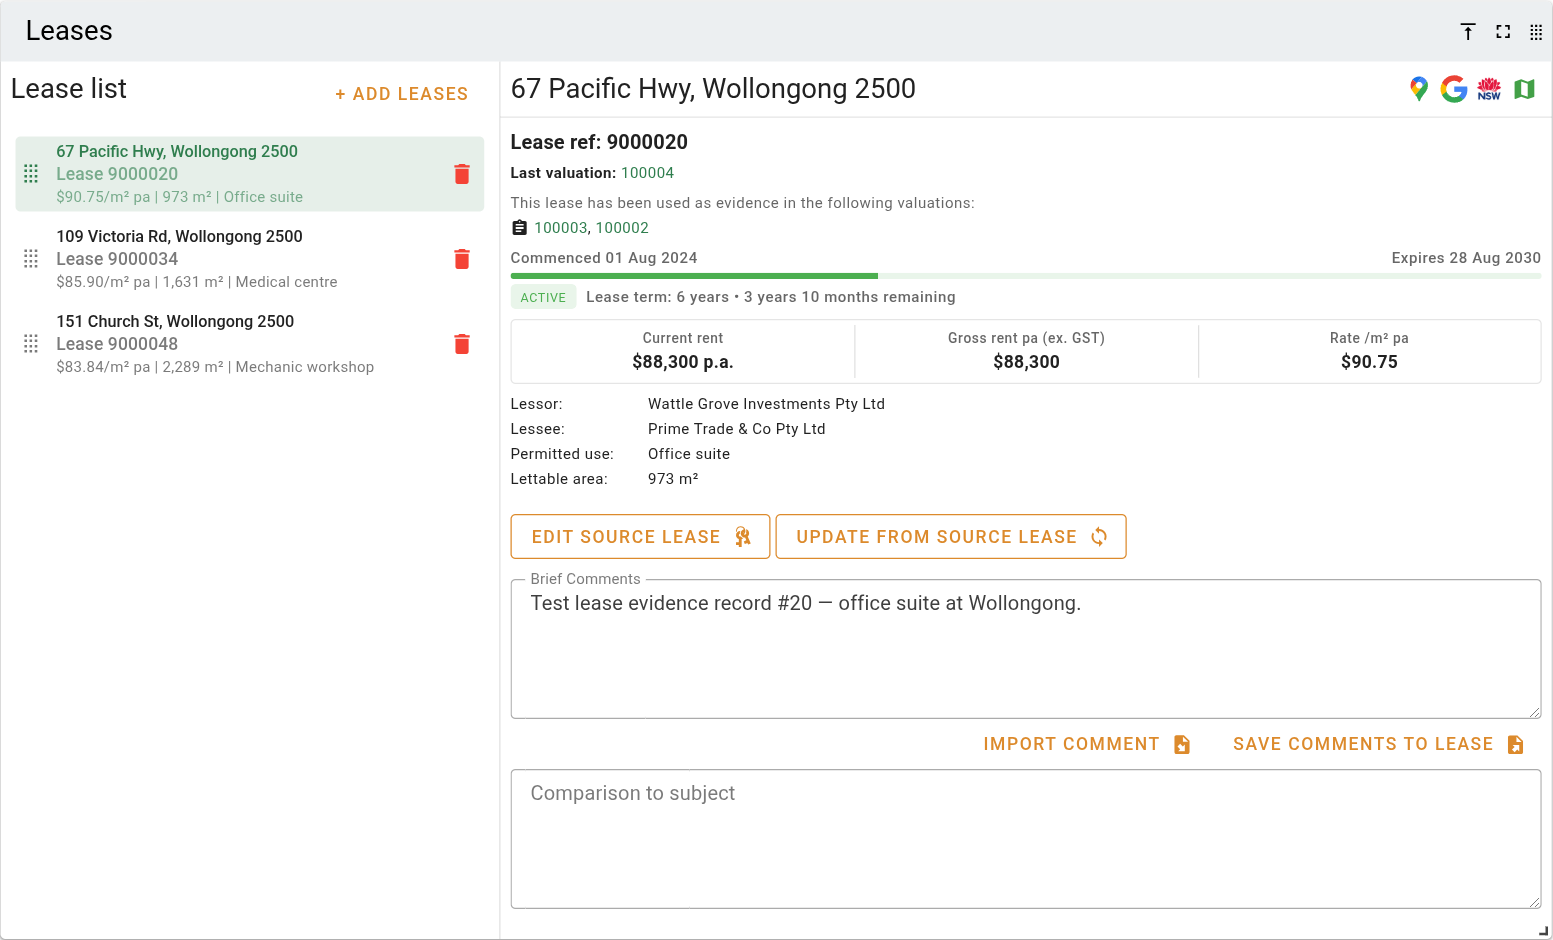
The panel has two halves. The Lease list on the left holds the leases attached to the valuation, and the details of the selected lease appear on the right. "No comparable leases have been attached." shows until you add one, and "No lease selected" shows on the right until you select a lease in the list.
Lease list
Each lease in the list shows its address, its lease reference, and a summary of its rent per square metre, lettable area, and permitted use.
Add lease dialog
The Add lease dialog lists candidate leases for the valuation's property. Leases already attached to the valuation appear first and start ticked, followed by the closest leases with the most similar lettable area. Tick the leases you want to include, then click Save.
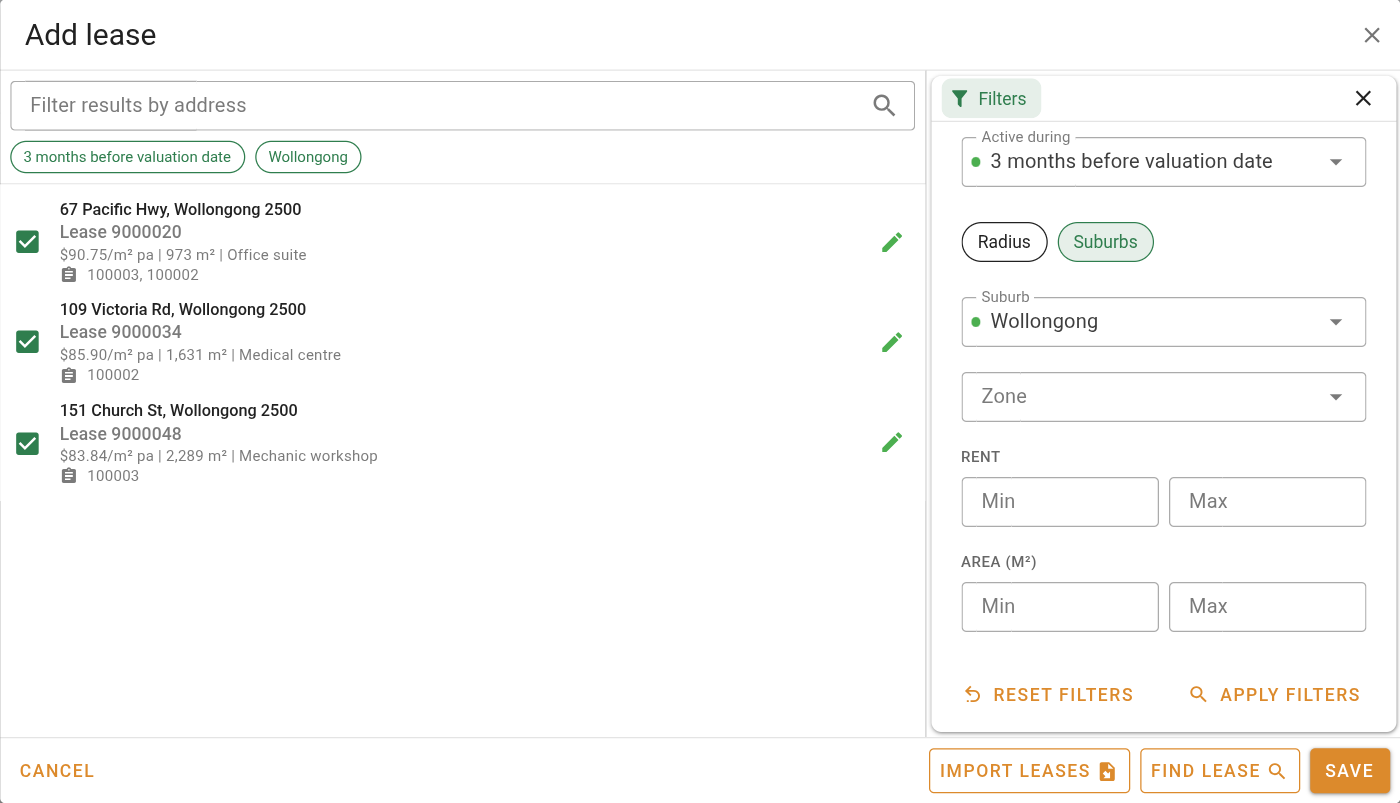
Click anywhere on a lease row to tick or untick it, the same as using its checkbox.
When a lease is already used as evidence in other valuations, their reference numbers are listed beside the icon.
The filters are in a panel on the right edge of the dialog. Click the button to open it, and the button in the panel header to close it. While the panel is closed, a green dot on the filter button shows that a suburb, zone, rent, or area filter is set. Changing a filter marks the search as customised for this valuation, and Reset filters returns them to their defaults.
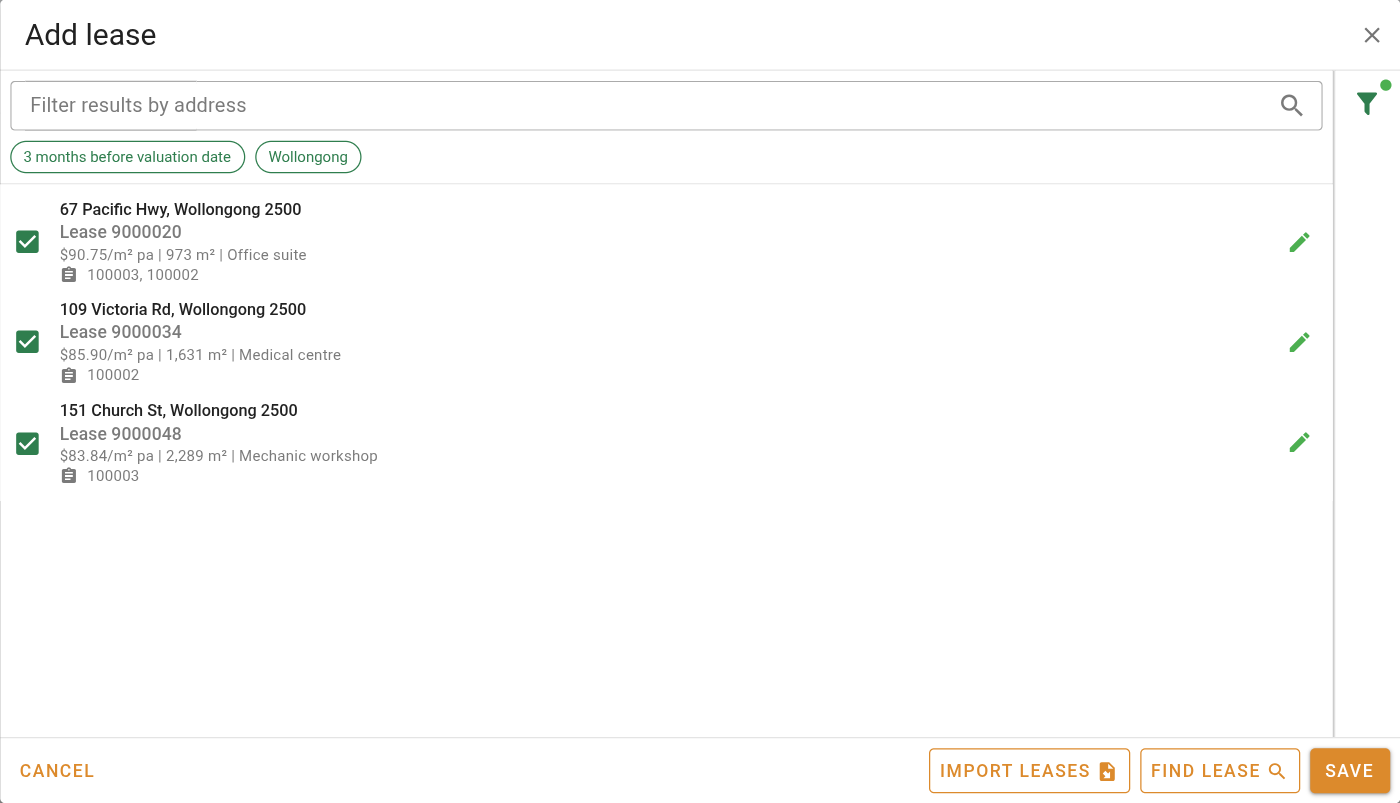
Filters panel closed, with a filter set
| Filter | Description |
|---|---|
| Active during | Limits the list to leases running during the period leading up to the valuation date. Enter how long before the valuation date and choose months or years; 0 lists leases active on the valuation date itself. The default is the period set in Settings | System | Leases evidence criteria. If the valuation has no valuation date, today's date is used. |
| Radius / Suburbs | Choose whether to search within a distance of the property or within chosen suburbs. |
| Radius (km) | The distance from the property to search. Shown when Radius is chosen. |
| Suburb | The suburbs to search. Shown when Suburbs is chosen. |
| Zone | Limits the list to leases in the chosen zones. |
| Min rent and Max rent | Limits the list to leases with a current rent within the range. |
| Min area (m²) and Max area (m²) | Limits the list to leases with a lettable area within the range. |
Click apply filters to run the search again. Leases you have ticked stay ticked, unless they no longer appear in the results. Type in Filter results by address to narrow the list to leases whose address contains the text. Upper and lower case are treated the same.
Selected lease details
Select a lease in the list to see its details. The top of the panel shows a read-only summary of the lease: its reference, term dates, status, current rent, gross rent, and rent per square metre, followed by the lessor, lessee, permitted use, and lettable area. These come from the lease as it was when it was attached, or last updated from the source lease.
Below the lease reference, Last valuation shows the most recent valuation completed at this property, as a link that opens it. Only visible when at least one valuation has been completed at the property.
The icon, also below the lease reference, lists the other valuations that use this lease as evidence. Each reference is a link that opens the valuation. When more than five are listed, click See more to show the rest. Not shown when the lease is only used on this valuation.
| Field | Description |
|---|---|
| Brief Comments | Your comments about this lease as evidence for the valuation. Attaching a lease copies its commentary here as plain text. |
| Comparison to subject | How this lease compares with the property being valued. |
Comments
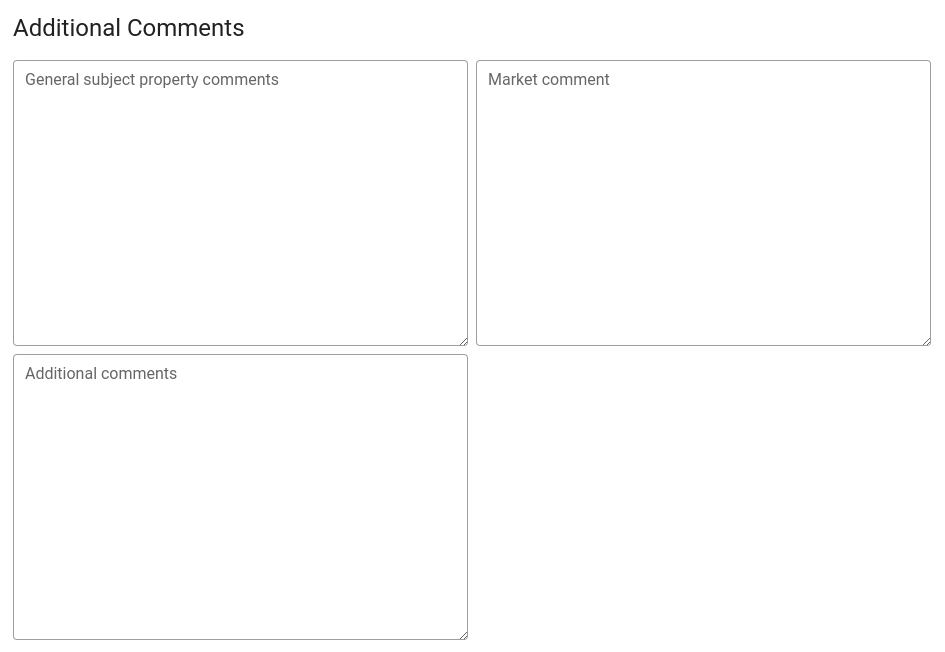
This panel provides space for you to provide additional commentary about the property and the valuation. This information will be included in the pro forma reports, and can be included in custom reports.
Attachments
Attachments are important enough to contain their own section in this help system, so please see Attachment panels for more information.
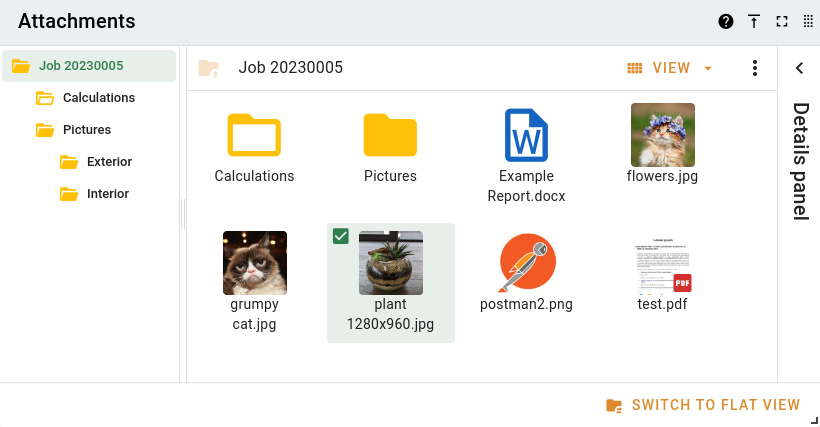
When you upload attachments, they're not immediately saved with the job. You must save the job to make the attachments "stick" to the job.
Notes
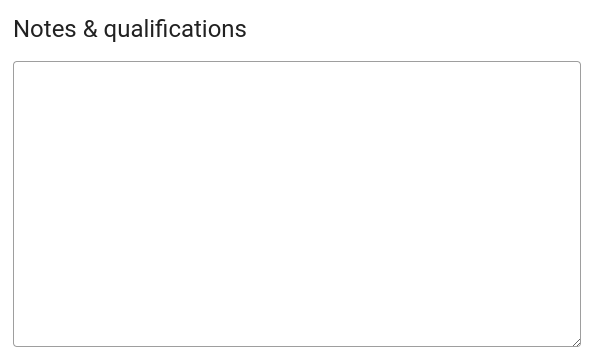
Notes & qualifications
This panel provides space for you to provide additional commentary about the property and the valuation. This information will be included in the pro forma reports, and can be included in custom reports.
Lender specific information
This panel provides space for you to provide additional commentary about the property and the valuation. This information will be included in the pro forma reports, and can be included in custom reports.
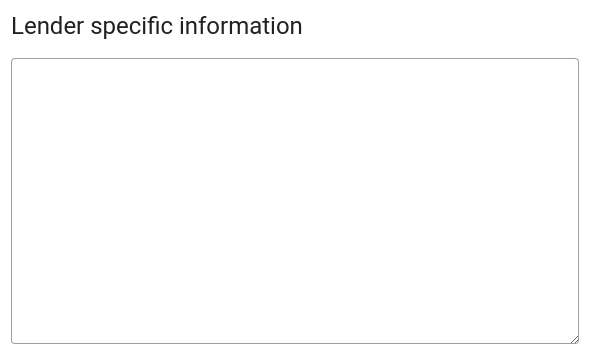
The Details | Client | Other client details panel has a Notes field at the bottom. If there is some commentary there, the icon to the right of the field will be enabled, and you'll be able to click the icon to send that commentary to this field.
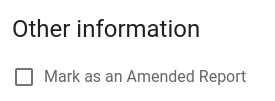
Other information
| Field | Description |
|---|---|
| Mark as an Amended Report | If this box is ticked, the report will be marked as amended. If the proforma report is printed, it will have "AMENDED REPORT" in the header, and custom reports can have this rendered as Yes or No. |
Report
If you are using the pro forma report (or haven't uploaded a report yet), you'll see this panel on the Report tab.
No report
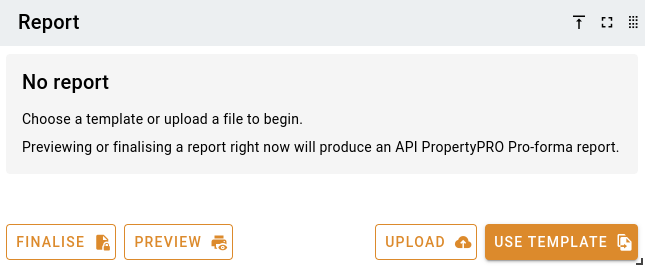
Click the Finalise button to mark the report as finalised.
Click the Preview button to have the system generate a pro forma report with a "DRAFT" watermark and show it in a new browser tab.
Click the Upload button to upload a document to be used as the report. This will result in the panel changing to the manually uploaded Draft report panel (displayed below).
Click the Use template button to select a template to use as the valuation report. This will result in the panel changing to the Report editor panel. Click this link for information about the report editor.
Draft report
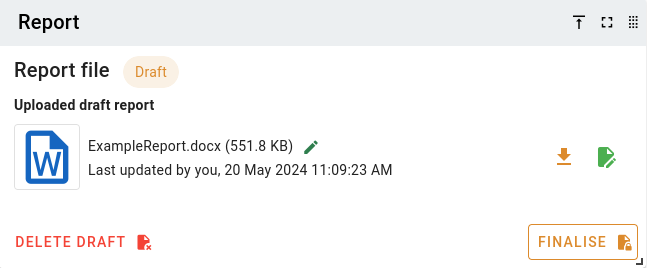
Click the Delete draft button to delete the draft and revert to the "No report" state above.
Click the Download button to download a copy of the report.
Click the Edit button to download a copy of the report and open it in an editor. See the Valuation report helper for more information.
Click the Finalise button to mark the report as finalised.
Finalised report
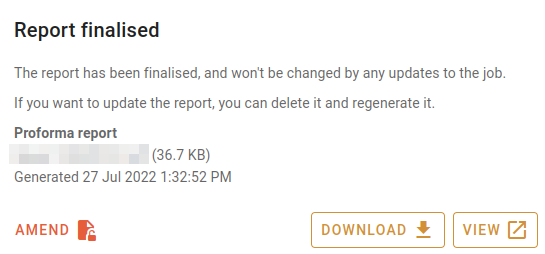
Click the Amend button to amend the report. The system will pop up a confirmation box, and you'll need to click the Confirm button to proceed with amending the report.
Click the Download button to download a copy of the finalised report.
Click the View button to open a view of the finalised report in a new browser tab.
Other jobs
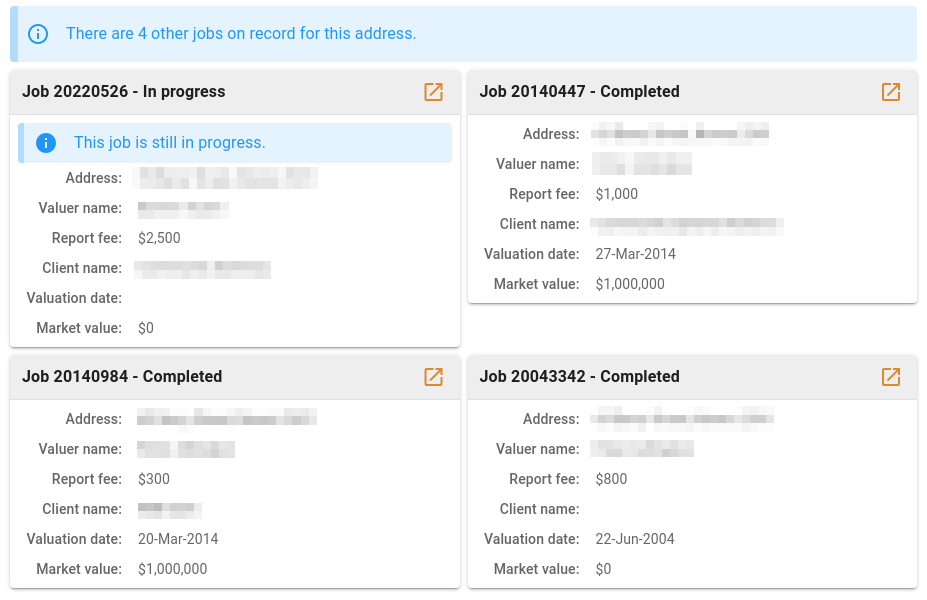
If there are other jobs for this property, they will show up in this panel. The panel will tell you how many jobs, and will also highlight jobs that are still in progress. For each job, the system will show you the:
- Address (should be the same as the current job)
- Valuer who was responsible for the valuation
- Report fee
- Client name
- Valuation date
- Market value
Event log
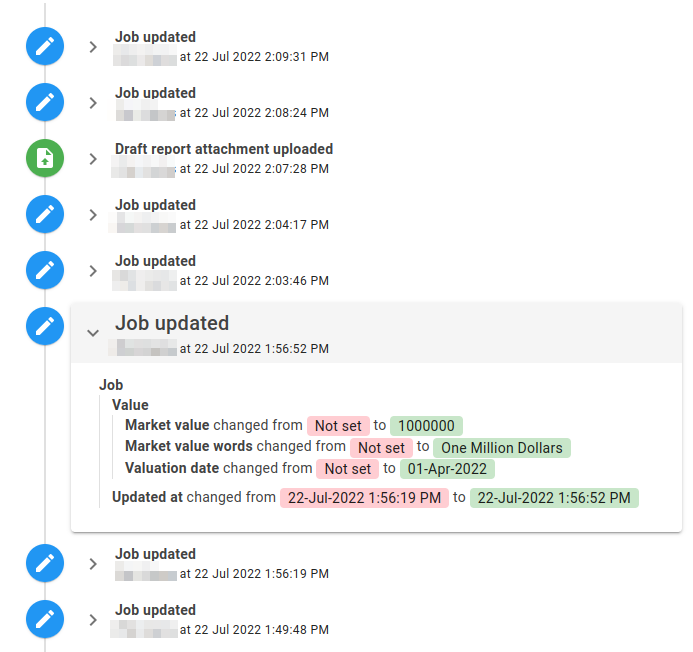
VOW keeps track of all updates to a job. In this panel, you can see:
- What was changed (and what part of the job it was)
- When it was changed
- Who changed it
Click the expansion button to unfold the change. Original values are shown in red; new values are shown in green.
Jobs that have been imported from other systems may not have any useful change history.
Imported data
The Imported data tab shows a job as it arrived from another system. Jobs have this data when they were created by a migration from your practice's previous software, or by a feed such as MVOW. The panel says which system the job came from and how: migrated from your previous software, sent by a feed such as MVOW, or updated with data retrieved from a property data service. Fields are listed in the order the other system kept them; empty fields are folded away behind a Show empty fields button. Turn on View raw data to see the record as plain text instead of a list of fields.
If the source data was not kept, the panel says so. On a job with no link to another system, it says the job has no data from another system.
You need the View the source data of imported records permission to see the panel. Without it the tab is not shown. See Roles.