

Managing attachments
Attachment management covers the operations available within an attachment panel: uploading files and folders, organising them into folder structures, renaming, tagging, moving, deleting, and controlling editing locks.
Uploading files
Files are uploaded through the drop zone in the attachment panel. See Drag-and-drop zone for where the zone appears in flat view; folder view provides an equivalent zone over the current folder pane. Up to 10 files upload in parallel. The maximum file size per file is 50 MB.
The following file types are accepted.
| Category | Accepted formats |
|---|---|
| Images | All common image formats (JPG, PNG, GIF, WebP, and others) |
| Audio | All common audio formats (MP3, WAV, AAC, and others) |
| Video | All common video formats (MP4, MOV, AVI, and others) |
.pdf | |
| Word processor | .docx, .doc, .odt, .rtf |
| Spreadsheet | .xlsx, .xls, .ods |
| Presentation | .pptx, .ppt |
| Plain text | .txt, .csv, .tsv |
.eml, .msg |
In folder view, an entire folder can be dragged from the file manager and dropped onto the drop zone. The folder's internal structure is recreated in VOW and each file is placed in its corresponding subfolder once uploaded.
Upload progress
The File upload progress dialog opens as soon as files are added to the drop zone. While uploading, the dialog shows the number of files uploaded so far and an overall progress bar. The dialog cannot be closed until all uploads have finished.
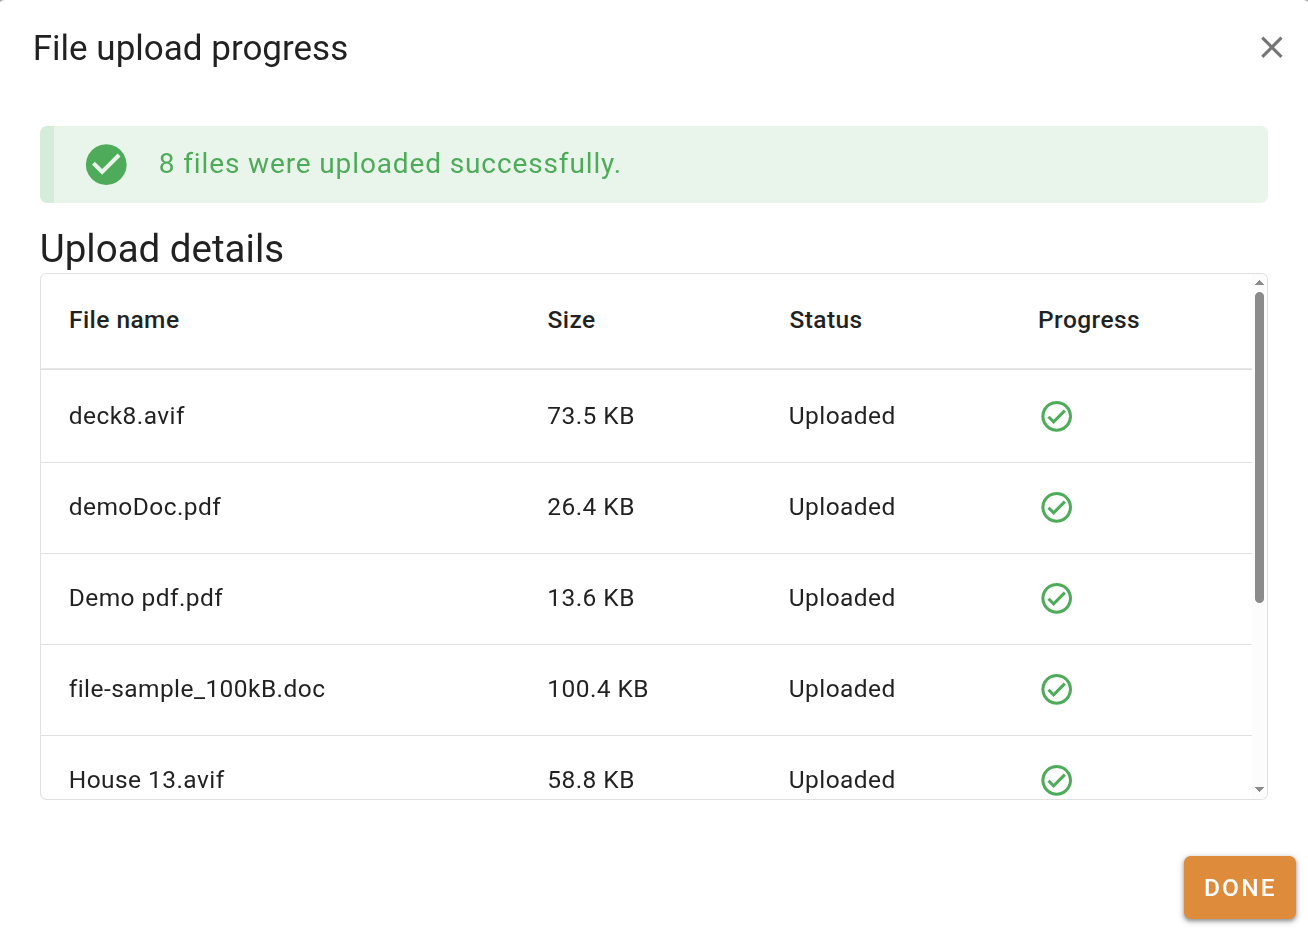
The Upload details table lists every file in the current batch.
| Column | Description |
|---|---|
| File name | The name of the file being uploaded. |
| Size | The file size. |
| Status | The current state of the file: Queued, Processing, Uploaded, or an error description. |
| Progress | A visual indicator: a green circle tick when the file uploaded successfully, a red circled exclamation mark if it failed, and a spinner while in progress. |
| Error | The error message for a failed file. Only shown when one or more files have failed. |
When all uploads are complete, a message appears above the table. If all files succeeded, a success message shows. If any files failed, an error message shows the failure count and directs you to the table for details. If uploading to the folder view, a second progress bar is shown while VOW organises the uploaded files into their folders. Click Done to close the dialog once uploads have finished.
File properties
The File properties dialog shows the metadata for a selected file or folder. It opens from two places:
- Click the button on a flat view card.
- Select View file properties from the context menu in folder view. Not available on the root folder.
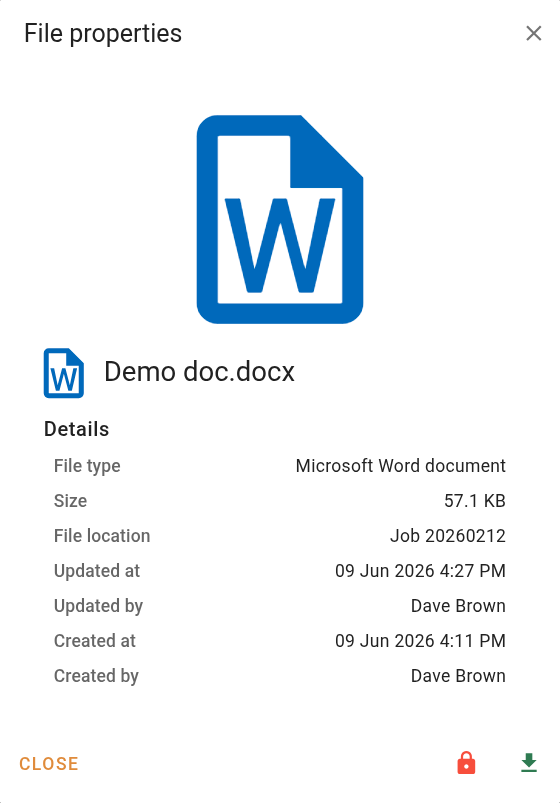
A thumbnail preview or file type icon is shown at the top. Click the button next to the file name to rename the file. Not shown for locked files, unsaved files, or when the panel is read-only.
For image files on valuation records, the caption is displayed as a chip below the thumbnail if one has been set. Status chips are shown below the file name when applicable: Hero image when the file is set as the hero image for the valuation, and Included in report when the image is included in the valuation report. These chips are only shown on valuation records.
| Field | Description |
|---|---|
| File type | The type of file, derived from its MIME type. |
| Size | The file size. For folders, the number of items directly inside the folder. |
| File location | The path of the file within the folder structure. Not shown for the root folder. |
| Updated at | The date and time the file was last modified. Not shown for the root folder. |
| Updated by | The name of the user who last modified the file. Not shown for the root folder. |
| Created at | The date and time the file was uploaded. Not shown for the root folder. |
| Created by | The name of the user who uploaded the file. Not shown for the root folder. |
| Lock status | Whether the file is locked for editing and by whom. Only shown for editable file types. |
The footer of the dialog contains the following actions.
| Action | Description |
|---|---|
| Close | Closes the dialog. |
| Unlocks the file. Only shown when the file is currently locked for editing. | |
| Downloads a copy of the file. | |
| Opens the delete confirmation dialog. Not shown when the panel is read-only or the file is locked. |
The Unlock and Delete buttons are mutually exclusive. A locked file shows Unlock but not Delete.
Tags
Tags are labels applied to files to categorise them. They are shared across your organisation and available on all records.
The tag selector opens from two places:
- Click the button on a flat view card, or select Tags from the context menu in folder view, to edit tags on a single file.
- Select Bulk tag from the context menu in folder view to edit tags across all selected files at once. Only available when multiple files are selected.
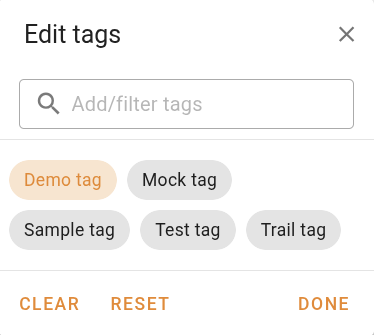
Type in the Add/filter tags field to search for an existing tag by name. Available tags are displayed as chips. Click a chip to apply or remove it. Applied tags are highlighted. When no tags exist yet, the selector shows a "No tags have been created yet." message.
When the search text does not match any existing tag, a Create "[name]" tag chip appears at the bottom of the list. Click it, or press Ctrl+Enter, to create the tag and apply it immediately.
Creating new tags requires the list creation permission. The create chip is not shown for users who do not have this permission.
| Action | Description |
|---|---|
| Clear | Removes all tags from the file. |
| Reset | Restores the tags to the state they were in when the selector was opened. |
| Done | Saves the selection and closes the selector. Tags are sorted alphabetically on save. |
Bulk tags
When the bulk tag selector is open, the dialog title shows the number of selected files. Each tag chip displays a three-state indicator reflecting how many of the selected files carry that tag.
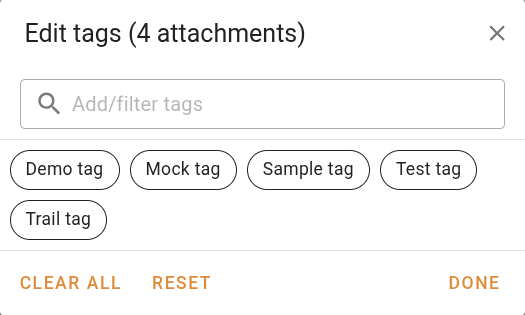
| State | Indicator | Meaning |
|---|---|---|
| All | Check icon | The tag is applied to all selected files. |
| Some | Minus icon, faded | The tag is applied to some but not all selected files. |
| None | Outlined chip, no icon | The tag is not applied to any of the selected files. |
Clicking a chip in the All state removes the tag from all selected files. Clicking a chip in the Some or None state adds the tag to all selected files.
The Clear all button removes all tags from every selected file. Reset and Done behave the same as in the single-file selector.
Renaming
The Rename attachment dialog renames a file or folder. It opens from several places:
- Click the button on a flat view card.
- Select Rename from the context menu in folder view.
- Click the button in the details pane or file properties dialog.
Not available on locked files, unsaved files, the root folder, or when multiple files are selected.
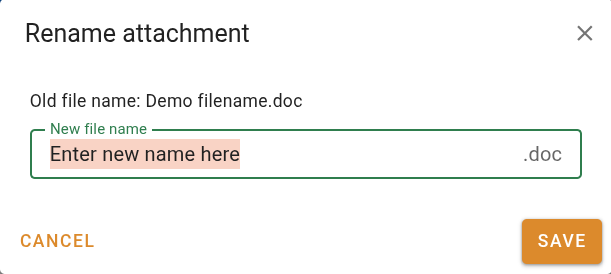
The current name is shown above the input field for reference. Enter the new name in the New file name field. For files, the extension is shown as a non-editable suffix and cannot be changed. For folders, no suffix is shown.
The Save button is disabled if the name is empty or matches an existing file or folder in the same location. Click Save to apply the rename, or Cancel to close without making changes.
Moving files and folders
Files and folders are moved by dragging them from their current location and dropping them onto a destination folder. Moving is only available in folder view.
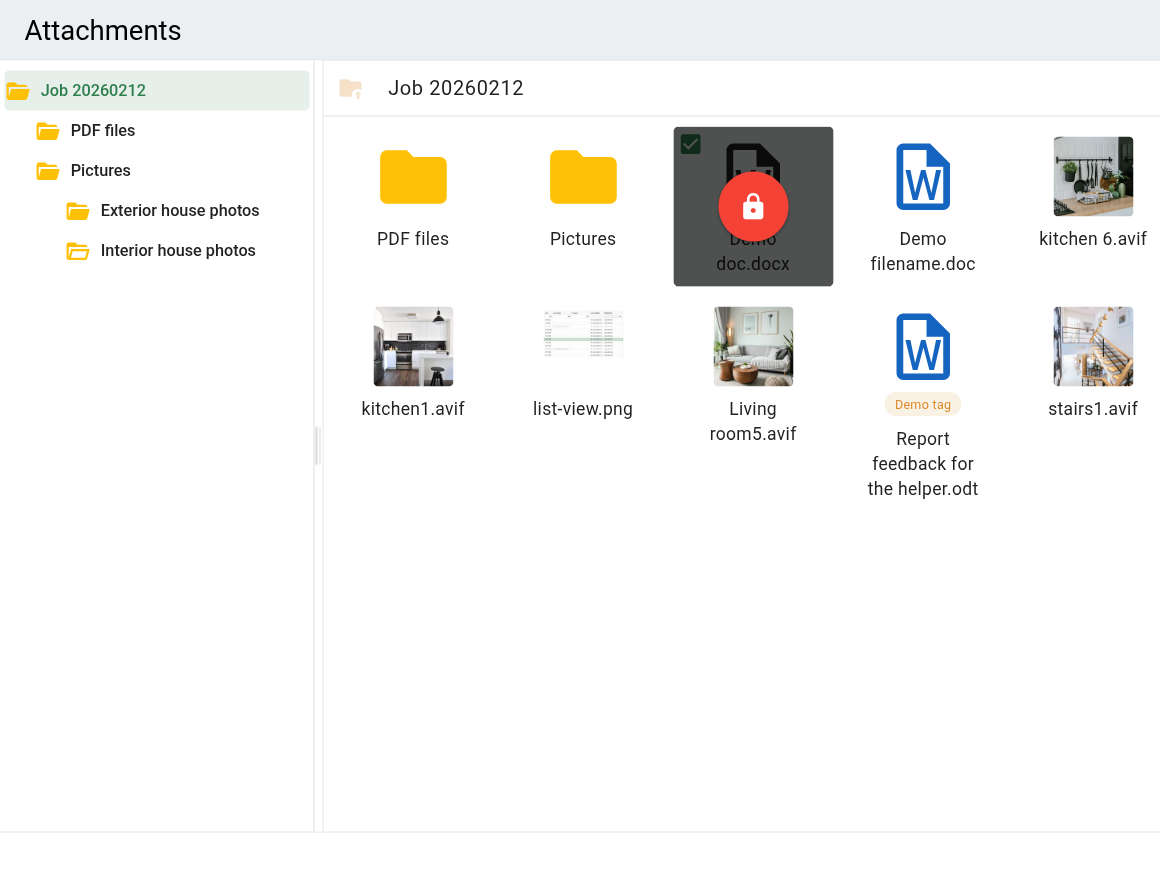
In grid view, a file or folder can be dragged onto a folder card within the same pane, or onto a folder in the directory tree. In list view, rows are dragged by the handle in the Name column and can be dropped onto a folder row in the same list, or onto a folder in the directory tree. Items from the directory tree can also be dragged onto a folder in the file pane.
When multiple items are selected, dragging any one of them moves all selected items together.
When a move completes, a notification confirms how many items were moved and names the destination folder. If items are dropped onto the folder they already belong to, a notification confirms that no change was made.
The following moves are not permitted:
- Dropping a folder onto itself
- Dropping a folder onto one of its own descendants
- Dropping an item onto a folder that already contains an item with the same name
An error notification describes the reason when a move is rejected. Moving is not available when the panel is read-only.
Creating folders
Folders can only be created in folder view. Right-clicking anywhere in the file pane or directory tree opens a context menu containing Add a new folder. The same menu is available from the actions button in the folder toolbar.
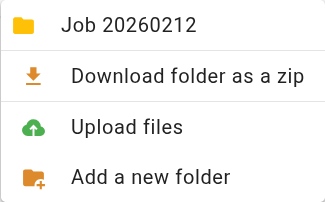
Selecting Add a new folder opens the Add folder dialog. The dialog shows the full path where the folder will be created. The destination is the folder that was right-clicked, or the currently open folder when the actions button or folder background is used.
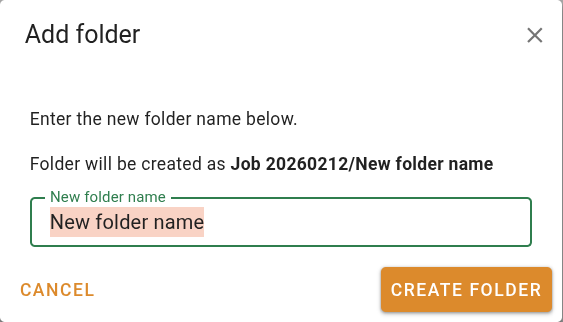
Enter the name in the New folder name field. The field is pre-filled with "New folder". The name cannot be empty, cannot contain a forward slash (/), and must not match the name of an existing folder in the same location.
Click Create folder to create the folder, or Cancel to close the dialog without making changes. The Create folder button is disabled while the name is invalid.
Deleting
Deleting removes a file or folder from the attachment panel. A confirmation dialog opens before any deletion takes place. Deletion can be triggered from several places:
- Select Delete file, Delete folder, or Delete files from the context menu in folder view. The Del keyboard shortcut is shown alongside this item and triggers the same action.
- Click the actions button in the folder toolbar and select the delete option.
- Click the button on an attachment card in flat view. Only shown for files; not available for folders, locked files, or when the panel is read-only.
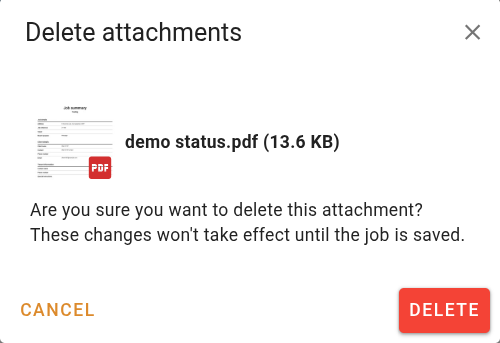
When a single file is selected, the dialog shows a preview of the file and asks for confirmation to delete it. When multiple files are selected, the dialog shows the number of items to be deleted. Click Delete to confirm, or Cancel to close without deleting.
The dialog includes a note indicating when the deletion will take effect. On most records, changes are not applied until the record is saved. On records that save attachments immediately, the dialog warns that the action is irreversible.
Restrictions
The following files and folders cannot be deleted:
- Locked files
- Folders that still contain items (the folder must be emptied before it can be deleted)
- The root folder
- Any file or folder when the panel is read-only
Folders cannot be deleted from flat view. Use folder view to delete folders.
Locking and unlocking
A file is locked when it is opened for local editing via VOW Helper. Locking happens automatically as part of that process and is not a separate action. A locked file cannot be renamed, deleted, or opened for editing by another user until it is unlocked.
Locked file indicators
A locked file is visually marked in all views.
In flat view, a dark overlay appears over the file's thumbnail with a lock button at the centre. The overlay tooltip identifies who has the file locked.
In grid view, the same dark overlay and lock button appear over the file card.
In list view, the row is displayed in a dimmer text style. The Lock status column shows the name of the user who has the file locked.
Unlocking
The Unlock file dialog opens from several places:
- Click the lock button in the overlay on a locked file card (flat view and grid view).
- Select Unlock from the context menu in folder view. Only shown for a single locked file. This is not available when multiple items are selected.
- Click the button in the footer of the File properties dialog. Only shown when the file is locked.
- Double-click a locked file in folder view.
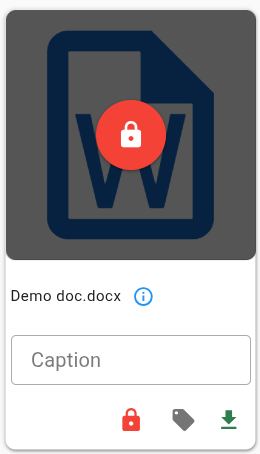
The dialog shows the name of the user who currently has the file locked and asks for confirmation. Click Unlock to unlock the file, or Cancel to close without making changes.
A user can always unlock a file they locked themselves. Unlocking a file locked by another user requires the file unlock permission. Attempting to unlock without permission closes the dialog and shows an error notification instead.