

Generating invoices
Invoices are handled in the valuation form in the Details | Invoices panel.
There are two ways to create an invoice - automatically, or manually. In either case, the Report fee (ex. GST) should be filled in before you create an invoice.
Automatic invoicing
This is by far the quickest and simplest way to create an invoice, and is best suited to simple jobs where there is one client, and you'll be invoicing them for the full report fee.
- Enter the Report fee (ex. GST).
- Save the job.
- Click the Auto invoice button.

An invoice will be automatically generated for the client and attached to the job.

The auto-invoice button should only be used to generate a single invoice for the full amount, for the sole client on the job. For more complex invoicing situations, use the manual creation process.
Manual invoicing
You can manually create an invoice using the + Add invoice button.

The basic steps to create an invoice manually are:
- Enter the Report fee (ex. GST).
- Save the job.
- Click + Add invoice.
- Make sure that the correct Bill to contact is selected, and that their details are correct.
- Make sure that the correct Bank account is selected.
- Add the Client job reference if you need to.
- Enter any Notes you'd like to appear on the invoice.
- Make sure that the invoice Amount (ex. GST) and GST are correct.
- You can update the Amount (ex. GST) or the Total (inc. GST) for each line item, and the other amounts for that line will be automatically calculated when you click outside the text box.
- If you're creating an itemised invoice, you can add line items at this step.
- Click Save to save and close the invoice.
The invoice will be generated and attached to the job.
The invoice number is automatically generated to match the invoice number, but you can change it if you need to.
Editing invoices
You can edit an invoice after you've created it.
Click the Action button on the invoice to show the action menu, and click
  Edit invoice.
This will show the invoice form.
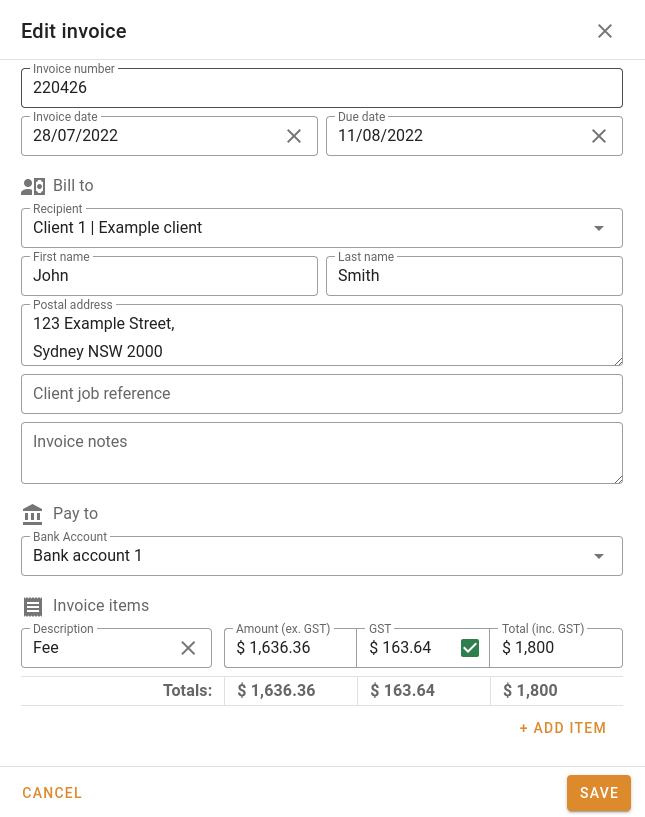
When editing the invoice, you can update the Recipient details, change the recipient, and add or edit notes to the client to appear on the invoice.
You can also update the amount, add or remove items, change their descriptions, etc.
Regenerating the attachment
If you save changes to invoice information, the attached file will become outdated, and you'll see the following warning.
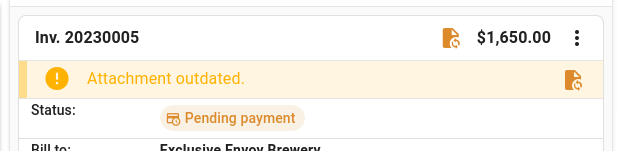
Just click the Regenerate invoice attachment button to sync the invoice attachment with the invoice data.
Editing the amount
Under Invoice items, there is a single item by default, with the description of Fee. We'll talk about Itemised invoices in a moment, but for now we'll deal with this single item.
The editable fields on the item are Description, Amount (ex. GST), and Total (inc. GST).
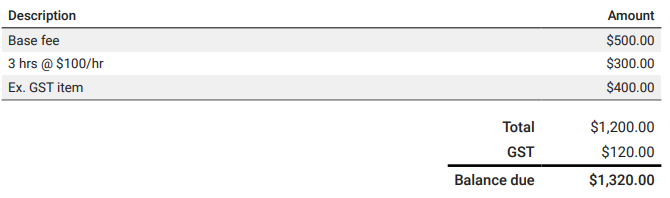
When you edit Description, you're changing the label of this charge on the invoice. When there's only a single item, the totals will show something like this on the invoice document:
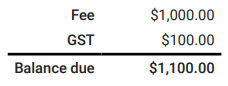
Updating the Description field will change the Fee label accordingly.
When it comes to changing the dollar amount on the item, you can change either the GST exclusive or inclusive amount, and we'll calculate GST and the other field automatically.
You can also enter a percentage. If you type 50% into one of these fields, we'll make the fee for that item 50% of the report fee, and update the description automatically to match.
Itemised invoice
Creating itemised invoices in VOW is super easy - all you need to do is click the + Add item button when you're editing the invoice.
Add a description and set the amounts the same way you would on a regular invoice. We keep a running total underneath the invoice items.
You can also choose to exclude individual items from GST if applicable.
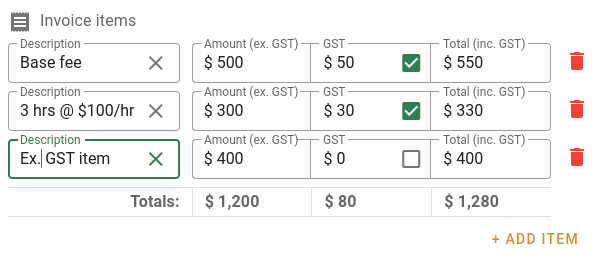
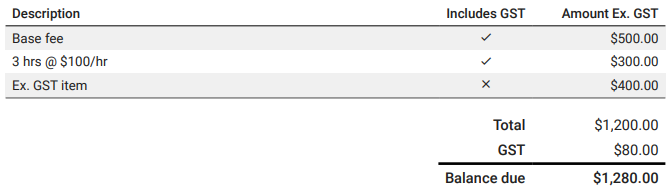
We have no character limit for item descriptions. Itemised invoices will show a table of items, as well as a grand total.
See below to see how itemised items show on the invoice attachment.
Itemised invoice
Itemised invoice with items excluding GST
Accepting payments
To accept a payment for an invoice, Click the Action button on the invoice to show the action menu, and click  Accept payment.
You'll see this popup:
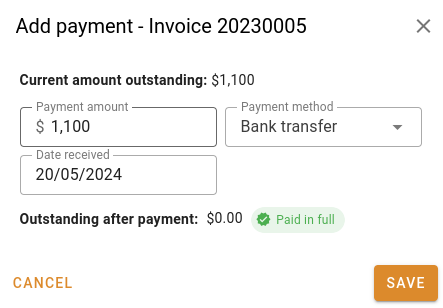
We'll automatically populate the outstanding amount into the payment field, but you can edit the amount if a client has provided partial payment. Select a Payment method if one is available, then click Save.
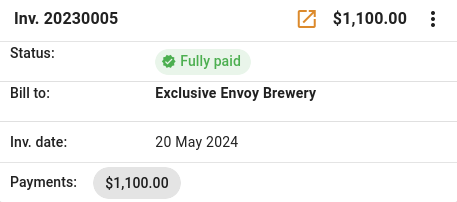
The invoice status will update to Fully paid if you've accepted full payment.
Sending invoices
Invoices can be sent via email to the client when you're composing an email on the valuation.
If you select the invoice attachment and send it, the invoice will be marked as Sent. Once an invoice has been sent to the client, it'll be locked and you won't be able to update it any more, though you'll still be able to accept and edit payments.
Only System administrators can unlock a sent invoice for editing again.