

VOW Tools Word add-in
VOW offers an add-in for Word called VOW Tools, designed to help you to create and use report templates.
You must have access to the Report Templates feature module to be able to use automatic data population with Word files. This is available on Professional or higher subscriptions.
Overview
The add-in allows you to insert placeholders into your Word report templates that reference fields in VOW. It does this using something called a content control, which is a text box that encloses some content in Word.
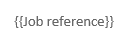
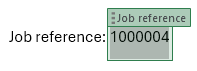
This is what they look like:
Template field
Selected template field
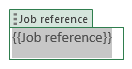
These template fields start out as read-only by default. You can enable editing if you want to change the placeholder content, or add styling to the field.
When upload a Word file with these template fields to a job (as the report or a normal attachment), VOW can automatically populate the template fields with corresponding data from the job. If you want recent changes to the job to be reflected in the document, you can trigger this automatic content update at-will using the button.
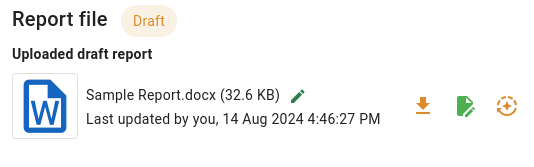
This will update every template field in the document, even if you’ve edited the content.
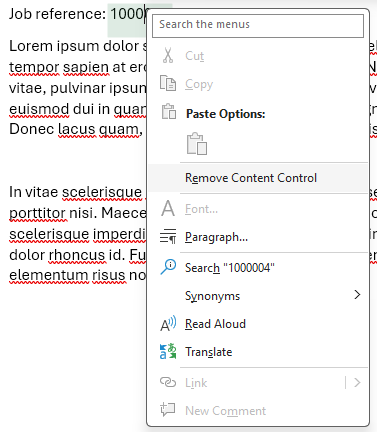
To prevent a template field from being updated again, you can unlink it — using the Unlink button in the Edit panel, or the Remove Content Control option in Word’s right-click menu. This will remove the template box, leaving the content unchanged.
Installing the add-in
The VOW Tools Word add-in is not yet published to the Microsoft store, so it must be manually loaded. This involves downloading the manifest file, sharing a folder on your network, and configuring Word to trust that folder.
Step 1: Download the manifest
Download the manifest file for the add-in. This is the file that Word will load to install the add-in.
Step 2: Share a folder
The add-in needs to be installed from a shared network folder. You'll need to create a shared folder and place the manifest file in it.
- In File Explorer on the Windows computer where you want to host the add-in, go to the parent folder, or drive letter, of the folder you want to use as your shared folder catalog.
- Open the context menu for the folder you want to use as your shared folder catalog (for example, right-click the folder) and choose Properties.
- Within the Properties dialog window, open the Sharing tab and then choose the Share button.
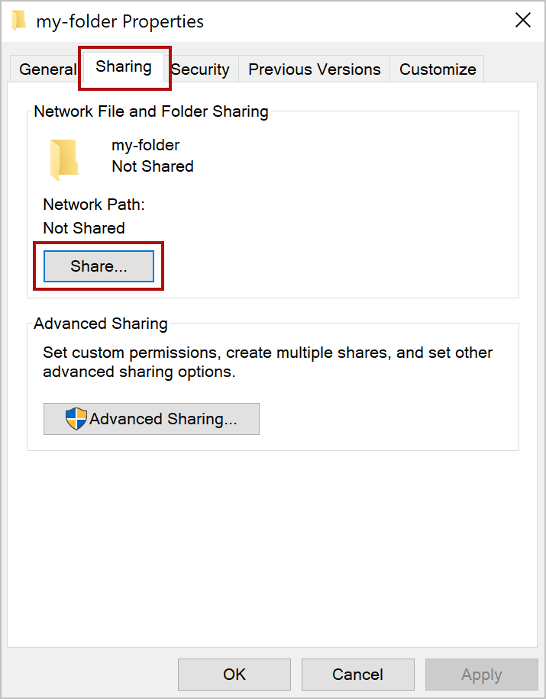
- Within the Network access dialog window, add yourself and any other users and/or groups with whom you want to share your add-in. You'll need at least Read/Write permission to the folder. After you've finished choosing people to share with, choose the Share button.
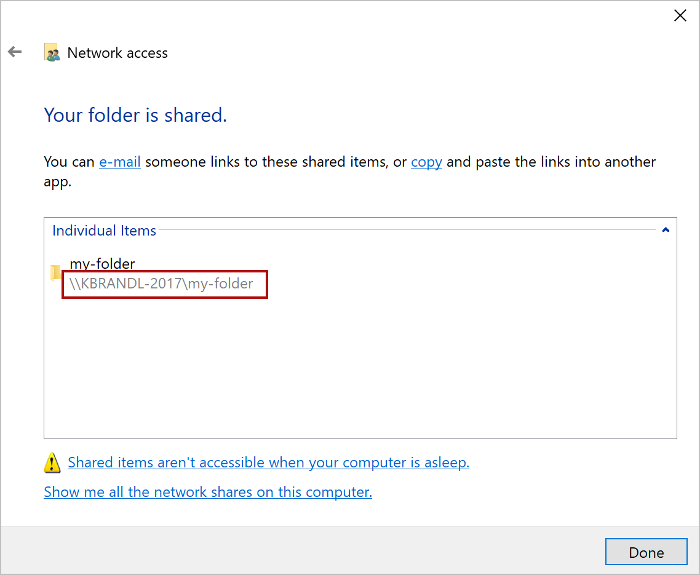
- When you see the Your folder is shared confirmation, make note of the full network path that's displayed immediately following the folder name. You'll need to enter this value as the Catalog Url when you configure the trust in Word. Choose the Done button to close the Network access dialog window.
- Choose the Close button to close the Properties dialog window.
Step 3: Configure Word to trust the shared folder
- Open a new document in Word.
- Choose the File tab, and then choose Options.
- Choose Trust Center, and then choose the Trust Center Settings button.
- Choose Trusted Add-in Catalogs.
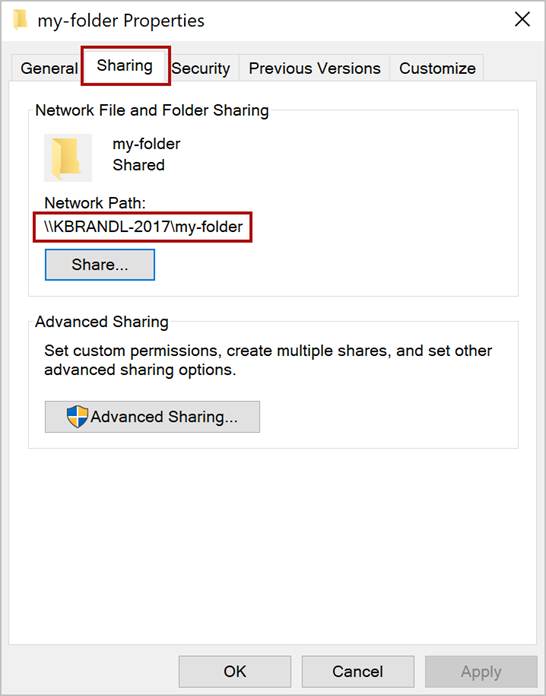
- In the Catalog Url box, enter the full network path to the folder that you shared in step 2. If you didn't note the folder's full network path when you shared the folder, you can get it from the folder's Properties dialog window on the Sharing tab.
- Choose the Add catalog button.
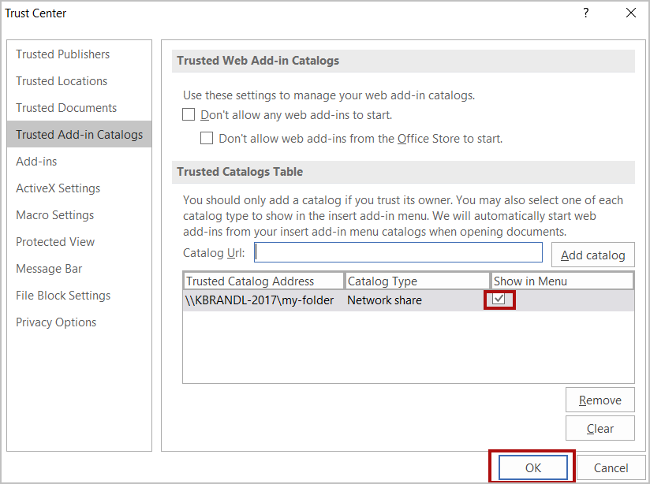
- Select the Show in Menu check box for the newly-added item, and then choose OK to close the Trust Center dialog window.
- Choose OK to close the Options dialog window.
- Close and reopen Word so your changes take effect.
Step 4: Load the add-in
- Put the manifest XML file that you downloaded in step 1 into the shared folder.
- In Word, select Home > Add-ins from the ribbon, then select Advanced. In the dialog, select My Add-ins.
- Choose SHARED FOLDER at the top of the Office Add-ins dialog box.
- Select the name of the add-in and choose Add to insert the add-in.
You should now be able to open VOW Tools from the Home ribbon.
For more detailed information about sideloading Office Add-ins, see Microsoft's documentation.
Opening VOW Tools
After you’ve installed the add-in, you should have a button in your Home ribbon in Word that looks like this:

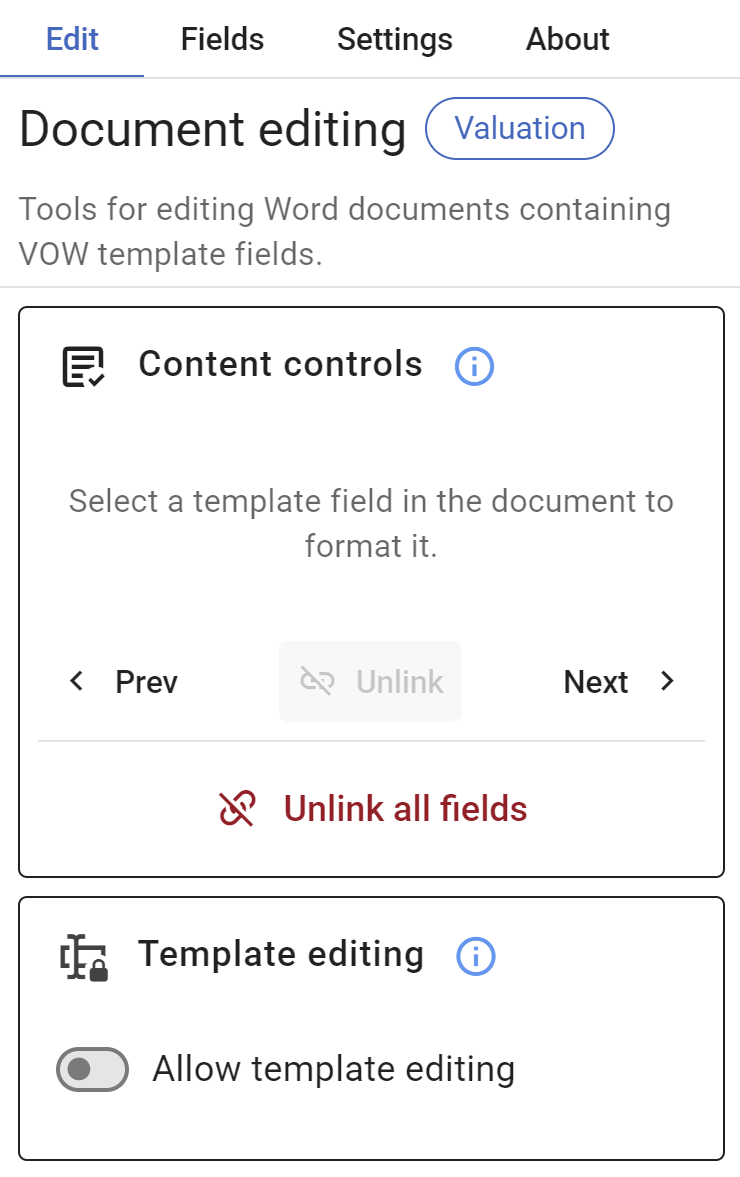
Click this button to open the VOW tools sidebar. It should look something like the below.
Navigating VOW Tools
The add-in has two main panels (Edit and Fields) and two supplementary panels (Settings and About).
Edit panel
The Edit panel includes useful tools for editing a document that already contains VOW template fields. This is the most useful panel if you're working on a real report, as opposed to creating a template.
You can use the actions in this panel to interact with template fields. Available actions include:
- Format options, which will determine how the field will be populated
- Unlinking the field from VOW
- Enabling/disabling manual editing of the field content.
You can also use this panel to cycle through the template fields in the document.
Fields panel
The Fields panel contains a categorised list of all the template fields that are available for use.
This panel is most useful for creating new template files, but you can use it to add template fields to existing reports. You can trigger the automatic content population once you send the file back to VOW.
The fields that show up in this panel depend on what you've selected as the Field source. The field source is the kind of item you want to make a template for. We currently support projects and valuations.
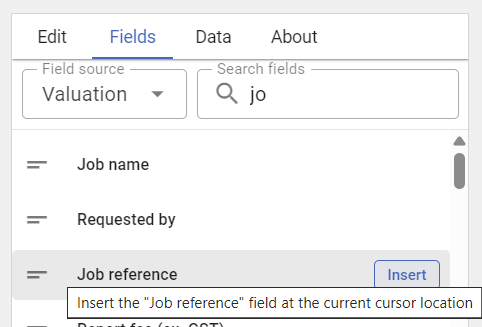
You can search for the field you want to insert, or you can pick from a recently inserted field.
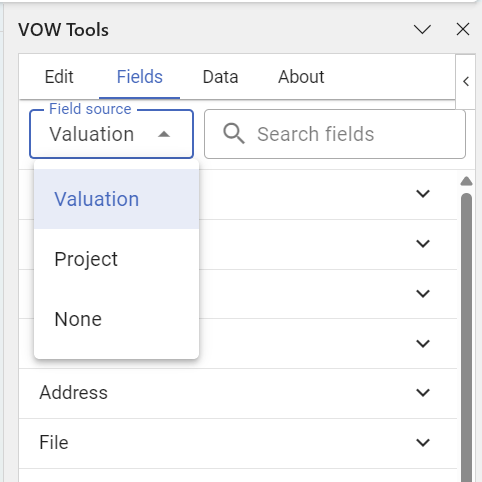
To insert a field into the document, hover over the field and click Insert.
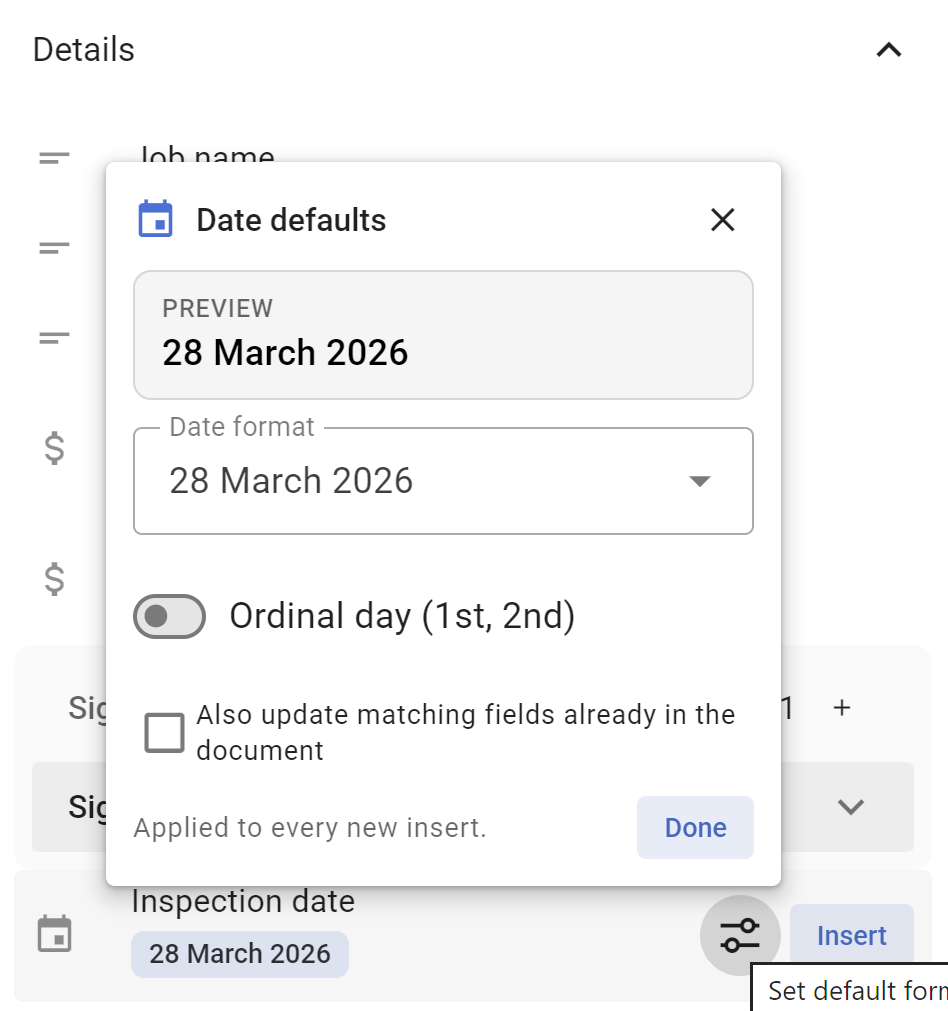
For fields with special formatting options, you can also set the default format of the field type before you insert it using the button. These fields will have a preview of their format under the field title.
Settings panel
The Settings panel is where you can manage the local data in VOW Tools, and set your format defaults.
If you intend to add client information into your reports, make sure you load your data file in this panel.
This allows VOW Tools to insert template fields that reference contacts on jobs by their role.
About panel
This panel contains basic information about the add-in, and you can use it to check the version number or access support.
Creating Word report templates with VOW Tools
VOW report templates are regular .docx files that can serve as a starting point for a valuation report.
To make a Word report template for VOW, begin by creating the document as you normally would. When you come to a stage where you want to add a placeholder, use the Fields tab to find and insert a template field.
Choosing the source type
The kinds of fields that appear in the Fields tab are determined by the selected Field source.
The field source is the type of item that you want to make a report for, e.g. Valuation or Project.
When you change the field source, the list of available fields will change, and we’ll update any existing fields in the document.
If we can find an equivalent field for the new source type, we’ll convert the old field to target the new item automatically. But if a field in the document is incompatible with the newly selected item type, it’ll turn red, and we’ll ignore that field when we populate data.
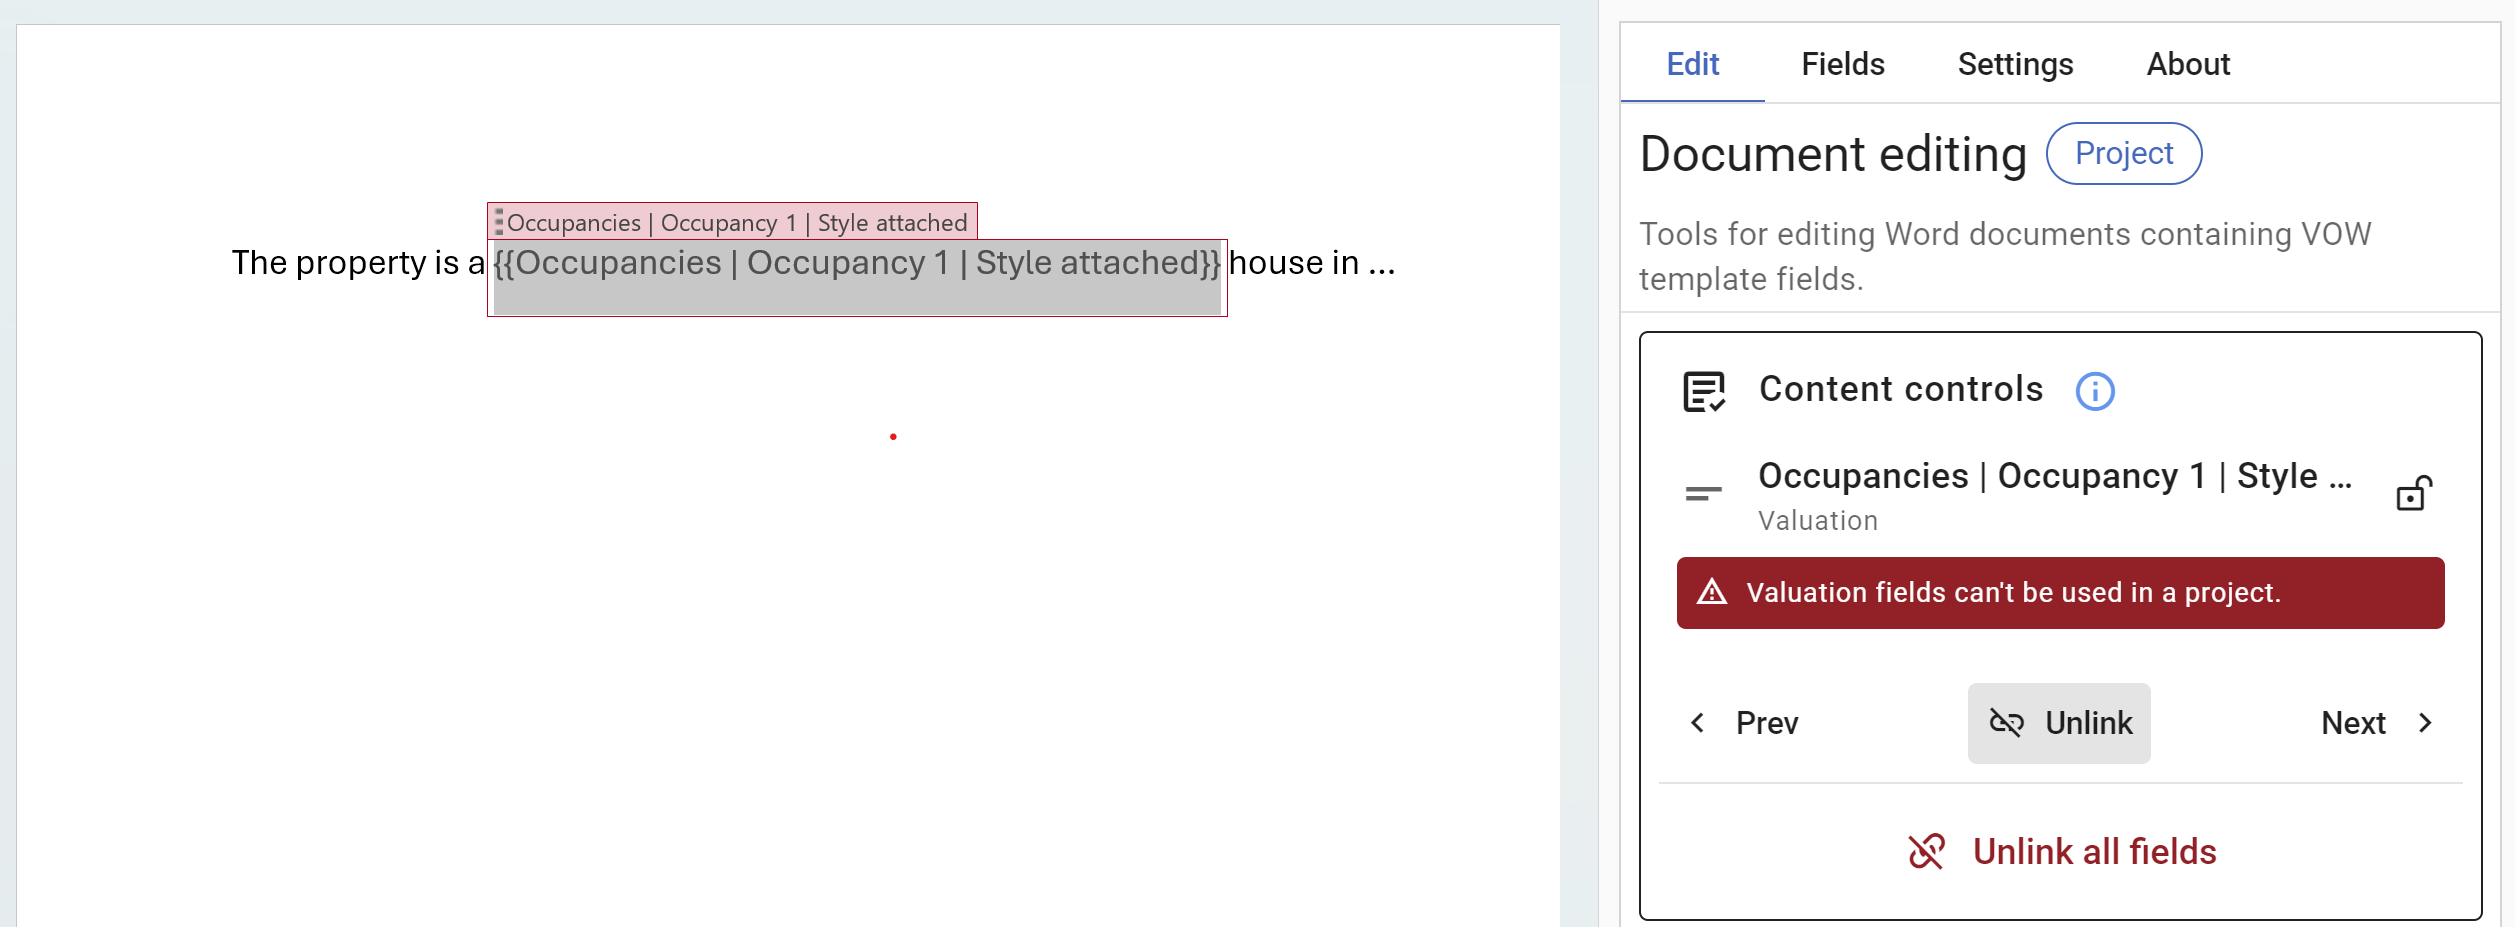
Invalid fields appear red, with an error message in the sidebar.
Inserting template fields
You can insert template fields from the Fields tab. Double-click a field or mouse over it and click Insert to add the field to the document at the current cursor location.
The template field will be inserted at the cursor location. The field will be locked by default, unless template editing is enabled in the Edit tab.
After inserting a field, you’ll need to click on the document again to continue typing.
There are a few different types of template field that you can insert. An icon next to each template field indicates its type, as seen in the screenshot below.
The different kinds of template fields
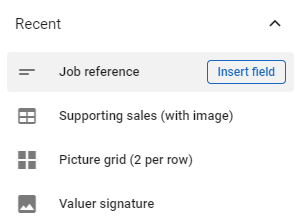
- Text fields are the most common type of field, including regular text, numbers and dates.
- Tables are used for displaying a bunch of information about one or more items. An example of tabular data is the supporting sales for a valuation.
- Pictures represent single instances of specific images associated with the job. Examples of this are the hero image, and signature images. There is also a field for a picture placeholder — this allows you to manually select an image from the file system.
- Picture grids represent the list of pictures on the job that are selected for inclusion in the report. You can choose how many images appear per row using the grid’s format options.
Picture controls aren’t updated when you change the Field source, and aren’t accessible using the Prev/Next buttons.
Once your template file is ready to be used on jobs, you can create a report template in VOW using the file.
You must have the System | Manage report templates permission to be able to do this.
- Go to Settings | Report templates
- Click New and choose File upload
- Give your template a name, then upload the file.
- Note: The name is to identify the template in VOW - it isn’t the name of the file itself.
- Save the template.
Once you’ve saved the template, you can apply it to jobs in VOW.
Field formats
Fields that hold structured data, like dates, currency amounts, numbers, areas and addresses, have formatting options that control how their values are written into the document. The options depend on the field type: dates offer a choice of date formats, currency fields can show or hide the $ symbol and cents or render the amount in words, areas can be expressed in square metres or hectares, and text fields can apply a casing such as Title Case or UPPERCASE.
Address fields can render the street address or the full address, include or leave out the property name and the state, apply casing, and split the address over multiple lines.
Picture grids place the images selected on the job into the document in rows. Their format sets how many images appear per row (from one to four), and whether each image’s caption is shown beneath it.
Formatting is applied when the fields are populated with data. If you change the format of a field that already has content, the document updates the next time you populate the data.
Format defaults
Your format defaults determine how newly inserted fields are formatted. (Reference and ID fields — like the job reference — have no formatting options at all.) In the Fields tab, each field with a configurable default shows a small preview of how it will look when populated:

Note that the previews use sample values only, and do not reflect the real value that is inserted - you'll see a different number or date once the field is populated.
To change the default format for a field type, hover over a field of that type and click the
button.The editor shows the options for the type with a live preview, and saves your changes as you make them. Tick Also update matching fields already in the document before clicking Done if you also want the new default applied to the fields you have already inserted.
Format defaults are personal settings: they are stored by the add-in on your computer, and apply to every document you work on.
You can review all of your defaults in the Format defaults section of the Settings panel. Each field type is listed with a preview of its current default. Click Edit to change one, or Reset all to return every type to its standard format (only visible when you have customised one). Basic text fields are not listed, because they are too generic for a single default. Set their casing per field in the Edit tab instead.
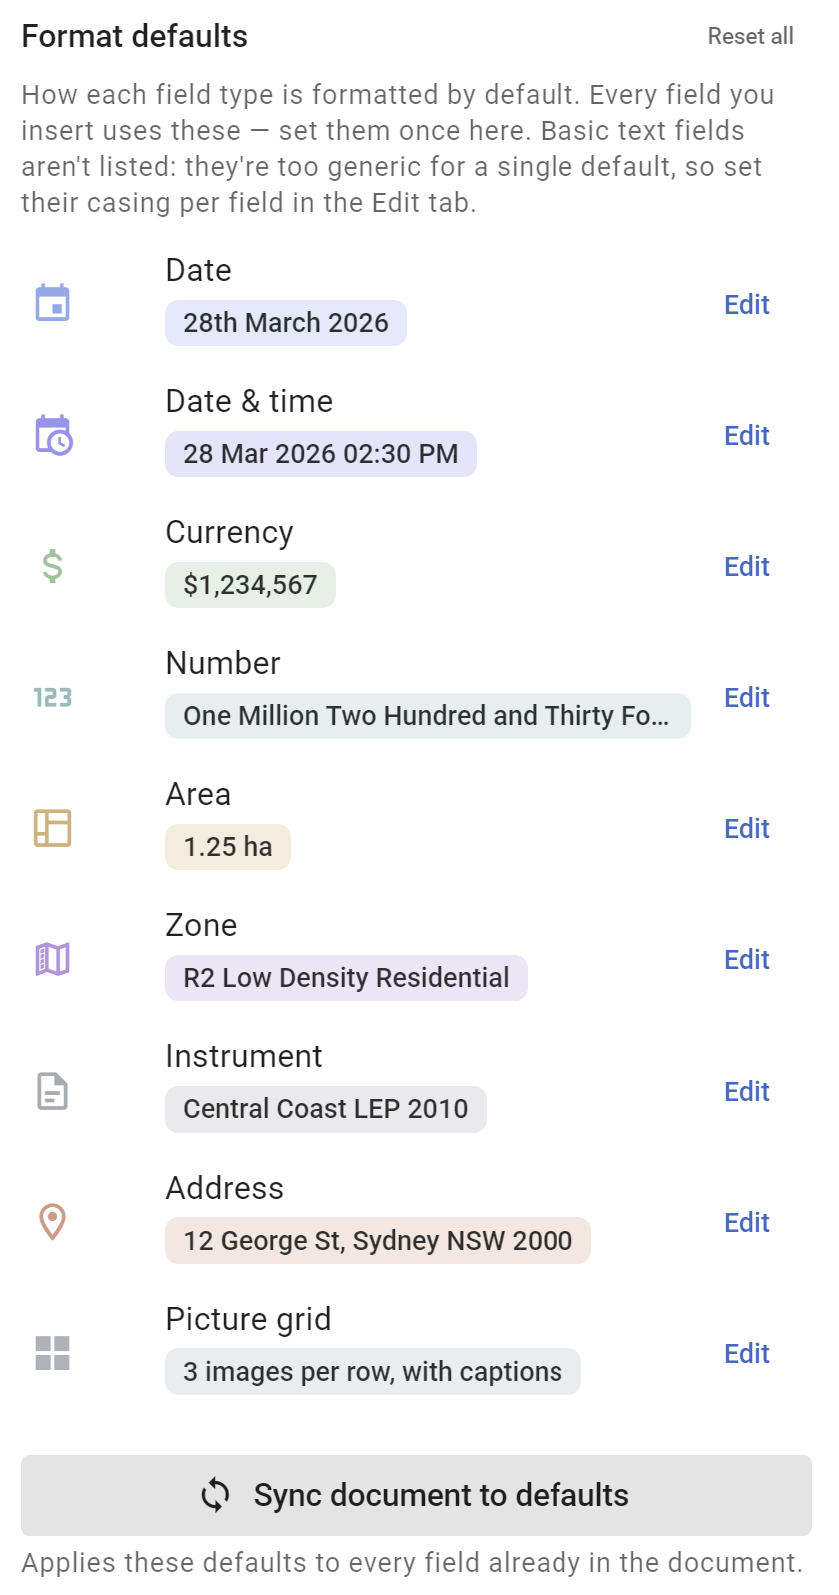
The Sync document to defaults button applies your defaults to the fields already in the document. Because this overwrites formatting you have set on individual fields, you are asked to confirm first.
Formatting a single field
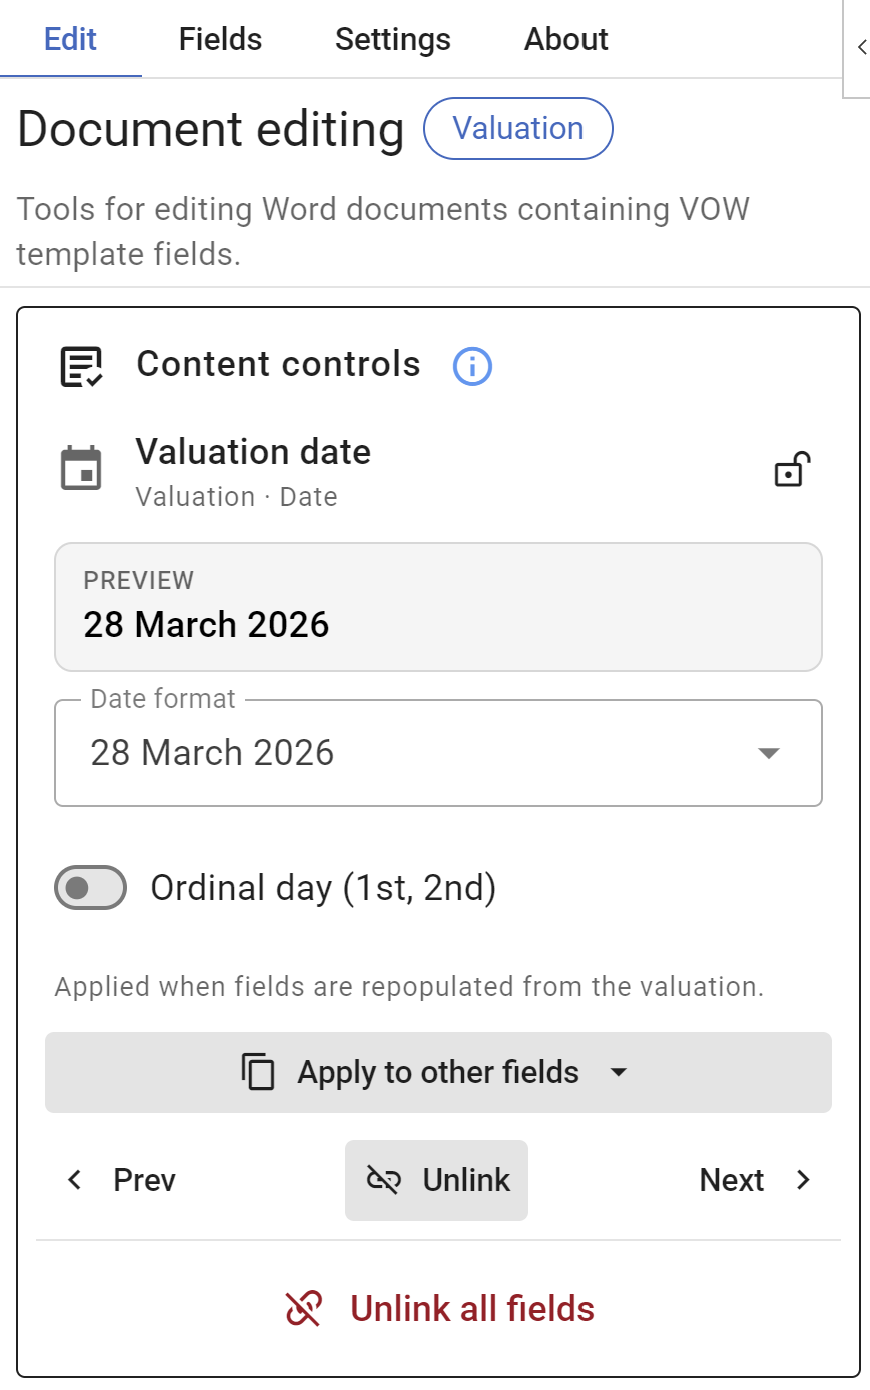
You can change the format of a single field from the Edit tab. Select the field in the document, and its formatting options appear with a live preview of the result. Changes are saved to the field immediately, and applied the next time the data is populated.
To reuse the formatting, click Apply to other fields. Depending on the field, you can apply it to every copy of the same field, to every field of the same type in the document, or save it as your default for new fields of that type. (For basic text fields the button simply applies the casing to every copy of that field.)
Automatic data population
You can populate the template fields in the report whenever you want with the Auto-populate button next to the report in VOW.
This will find all the template fields in the document and replace their contents with data from the job in VOW.
If you’ve made changes to content inside a template field in the report, this process will overwrite them. If you want to make sure your changes stick around, you need to unlink the field.
Editing reports with template fields
Once you’ve populated the template fields, you can edit the report just like a normal document.
To edit a Word report on a valuation, we recommend you use the VOW Helper.
The template fields begin as read-only, and will look just like a normal part of the report until you mouse over them, or otherwise place the cursor inside them.
Selecting fields
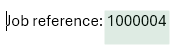
When you mouse-over a template field, you’ll see a light-green highlight:
When you move the cursor inside a field, you’ll be able to see the containing text box and its label:
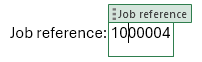
To select an entire field, click on the label. This allows you to move or delete the field (along with its content).
If you just want to check each template field in a document, you can easily scan through all the fields in the document using the Prev and Next buttons.
Editing fields
Since the field is read-only, you won’t be able to change a field’s content until you enable editing, but you can move or delete it. To move a field, click on the label, and drag it. To delete a field along with its content, select the entire field by clicking on the label, and then press either the Backspace or Del key.
To change a field’s content, go to the Edit tab and switch on Allow template editing.
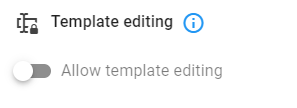
This allows you to update the content inside a template field, while maintaining the field’s link to VOW. If you re-populate the fields though, you’ll lose these changes, and whatever is in VOW will replace the content in the field. If you don’t want your changes to be overwritten, you’ll need to unlink the field instead.
Unlinking fields
Unlinking a field keeps its text but disconnects it from VOW. The content becomes a regular part of the document, the text box and label disappear, and VOW will no longer update it.
Under the hood, each field is wrapped in a Word content control — unlinking simply removes that content control while leaving the text behind.
There are two ways to unlink a single field without deleting its text:
Method 1: In the Edit tab, click Unlink near the bottom of the panel while the field is selected.
Method 2: Right-click the field and choose Remove content control — Word’s own name for unlinking — from the context menu:
Importing data to VOW Tools
VOW Tools has a bunch of default template fields available for you to insert into the document, but some fields get built based on your system lists in VOW. To get this data into the add-in, you need to import a file from VOW.
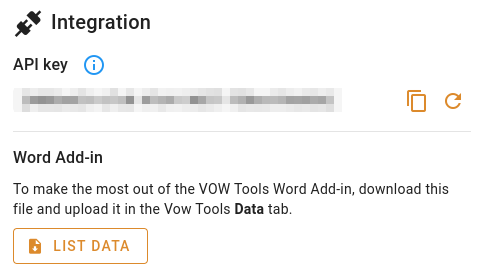
- First, open VOW and go to Settings | My settings.
- The Get file from VOW button in the Settings panel of VOW Tools takes you to this page.
- Go to the Integration panel, and click the
 List Data button.
 - This will download a file named
Vow Tools Add-in data.YYYY-MM-DD.json, which contains your company’s list data.
- This will download a file named
- Import the file in the Settings panel.
- Click Import file… and browse to the file, or drag and drop the file anywhere on the Settings panel. A Drop to import overlay appears while you drag the file over the panel.
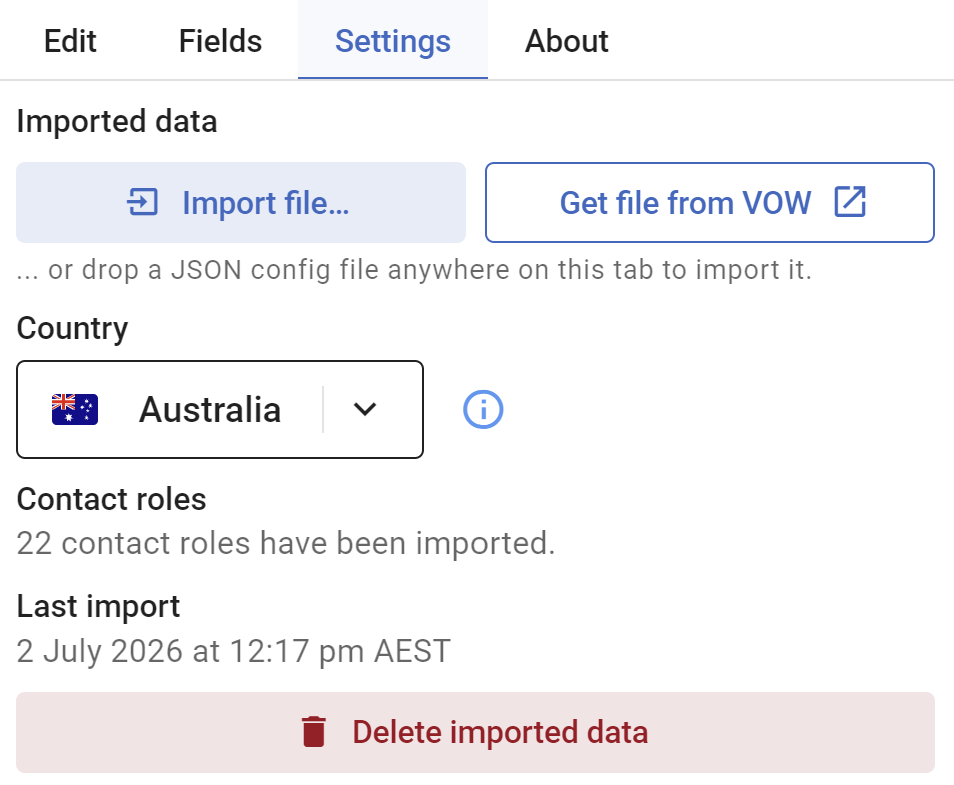
You should see a confirmation message to let you know the file was imported successfully, and the Contacts section in the Fields tab should now have items that correspond to your contact roles in VOW.